

Level 2 Charger J1772 Explained: Speeds, Amps and Wiring
A J1772 plug doesn't tell you how fast your car will charge. It tells you the connector can fit; the vehicle's onboard charger and the property's electrical circuit determine how much power the car can use.
That's why buying the highest-amp charger you can find can be a poor first move. If your car can't accept the extra power, or your electrical panel can't safely support the circuit, a bigger rating may add cost without adding useful charging speed.
Table of Contents
Level 2 Charging Speeds at a Glance - Why the car matters as much as the charger
What the J1772 Standard Actually Defines - Level 1 and Level 2 use different supply arrangements
Volts, Amps and the Circuit You Need - What the table can't decide for your property
Installing a Level 2 Charger at Home or Work - If the panel can't support the charger as planned
Level 2 Charging Speeds at a Glance
EVSE amp setting | Voltage | Power (kW) | Approx. range added per hour, theoretical at full car acceptance |
|---|---|---|---|
16 A | 240 V | 3.8 kW | About 11 to 15 miles |
24 A | 240 V | 5.8 kW | About 17 to 23 miles |
30 A | 240 V | 7.2 kW | About 22 to 29 miles |
32 A | 240 V | 7.7 kW | About 23 to 31 miles |
40 A | 240 V | 9.6 kW | About 29 to 38 miles |
48 A | 240 V | 11.5 kW | 35 to 46 miles |
80 A | 240 V | 19.2 kW | About 58 to 77 miles |
The range estimates use an illustrative efficiency of 3 to 4 miles per kilowatt-hour and assume the car accepts the full charging rate. The calculation behind the power column is simple: volts multiplied by amps, divided by 1,000, equals kilowatts. These are theoretical ceilings, not promises about what a particular car will gain in an hour.
A commercial building may supply 208 volts rather than a home's typical 240 volts. At the same amperage, that lower voltage produces about 13 percent less power, so the 240-volt figures in the table won't apply exactly.
Why the car matters as much as the charger
Real-world charging adds roughly 10 to 30 miles of driving range per hour, depending on the vehicle's onboard AC charger, battery state, temperature, and charging power, as described in the Alternative Fuels Data Center's charging-station guidance. The car's onboard charger is the equipment that converts the incoming AC power into the form the battery stores. It can limit the rate even when the wall unit and circuit could provide more.
The practical rule: The lower of the car's onboard charging limit and the circuit's supported rate sets the charging speed. A 48-amp unit won't charge a car at 48 amps if the car only accepts 32.
That's the useful way to read the table. Match the charging rate to the car and the property, then decide whether the additional circuit capacity would help your actual routine.
What the J1772 Standard Actually Defines
Think of J1772 as a standardized plug shape paired with a safety handshake. A compatible connector fits the vehicle, but the car and charging equipment still have to agree on how much current to use. It's a little like a phone and a wireless router settling on a connection they can both handle: the connection standard doesn't mean every device will operate at the same speed.
The SAE J1772 connector has two power lines, a ground, a neutral pin used for Level 1, and two low-current signal pins. Those signal pins let the vehicle and charging equipment communicate. In plain terms, the charger indicates how much current it can supply, the car signals how much it will draw, and the system can stop the session if it detects a problem.
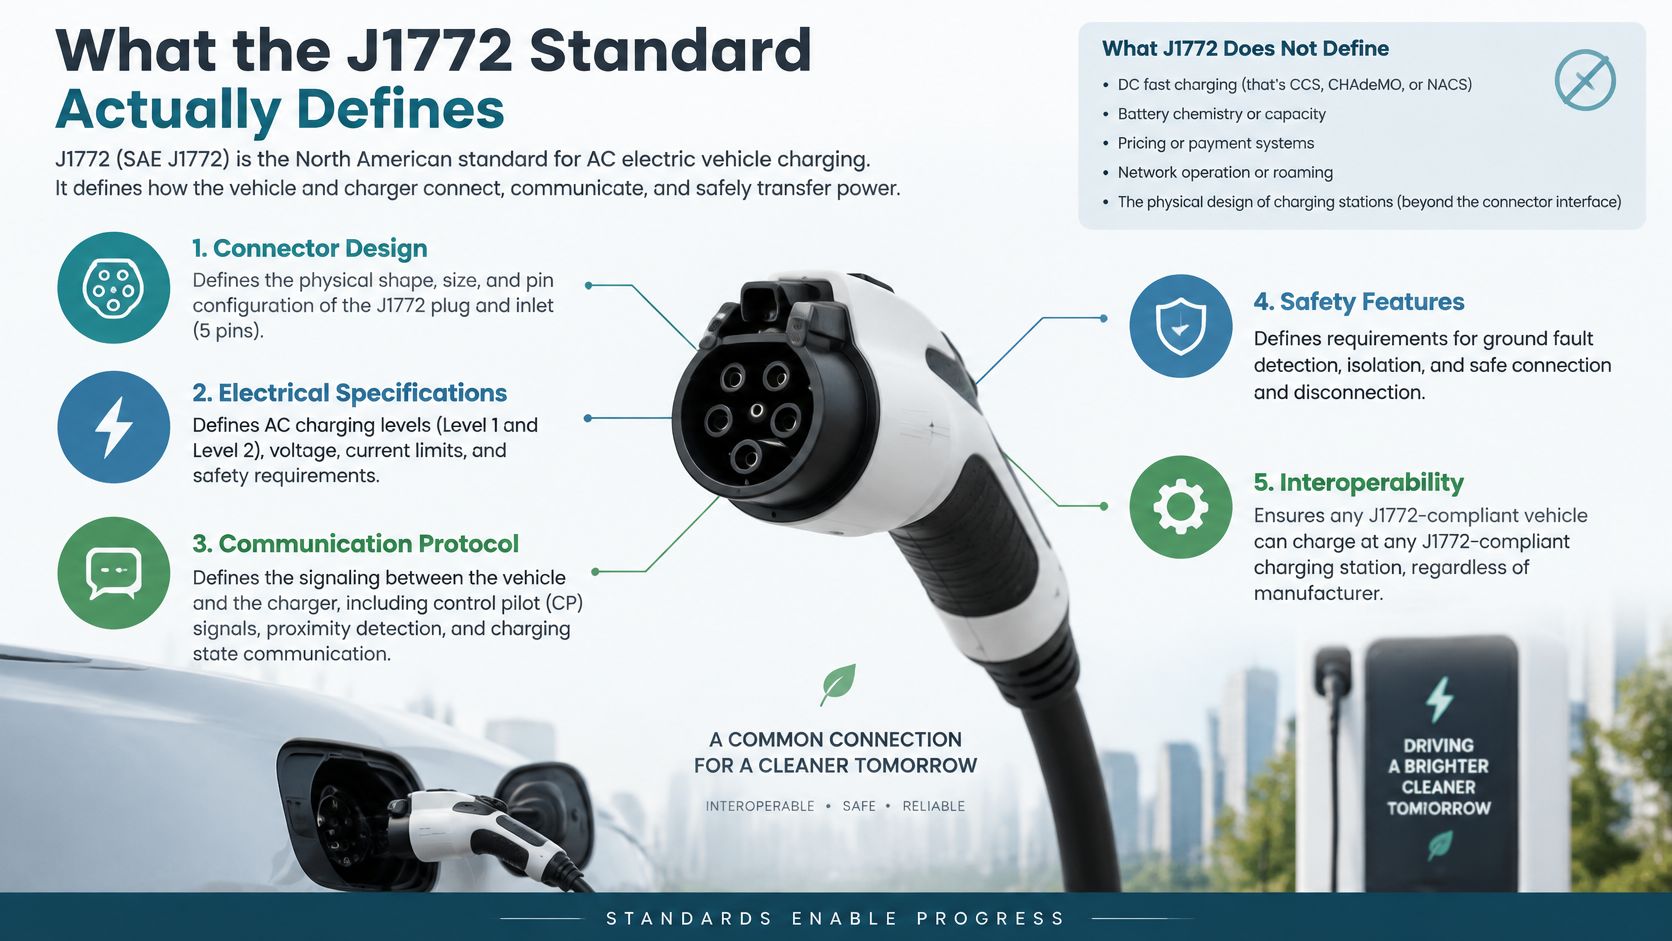
Level 1 and Level 2 use different supply arrangements
Level 1 uses a standard 120-volt household outlet and typically supplies about 1.2 to 1.4 kilowatts. Level 2, the focus here, uses 240-volt single-phase service in a home; commercial buildings may use 208-volt service. That higher-voltage supply gives Level 2 equipment substantially more charging capability than Level 1 equipment.
The connector standard governs the plug, communication, and safety handshake. It doesn't promise that every J1772 vehicle will charge at the same rate, or that every property can support every charger setting. For more detail on the connector itself, see this guide to the Level 2 EV charger plug.
Volts, Amps and the Circuit You Need
An EV charger can draw power for hours, so electricians treat it as a continuous load. A common sizing rule is to rate the circuit's breaker at 125 percent of the charger's amp setting. The table shows planning examples for copper conductors with 75°C-rated terminals, but it isn't a substitute for a site-specific electrical design or local code review.
EVSE amp setting | Breaker size | Minimum copper wire | Typical fit |
|---|---|---|---|
16 A | 20 A | 12 AWG | Light use, small battery |
24 A | 30 A | 10 AWG | Commuter with partial overnight charging |
32 A | 40 A | 8 AWG | Most single-car homes |
40 A | 50 A | 6 AWG | Two EVs or long daily driving |
48 A | 60 A | 6 AWG | Fast home charging for cars that accept 48 A |
80 A | 100 A | 3 AWG | Commercial sites or rare high-power home installs |
The breaker protects the circuit from carrying more current than it's designed to handle. The conductor, or wire, must also be suitable for the current and installation conditions. At the high end, an 80-amp charger calls for a dedicated 100-amp circuit in this planning example, plus enough capacity in the panel. That's one reason such installations are uncommon in homes.
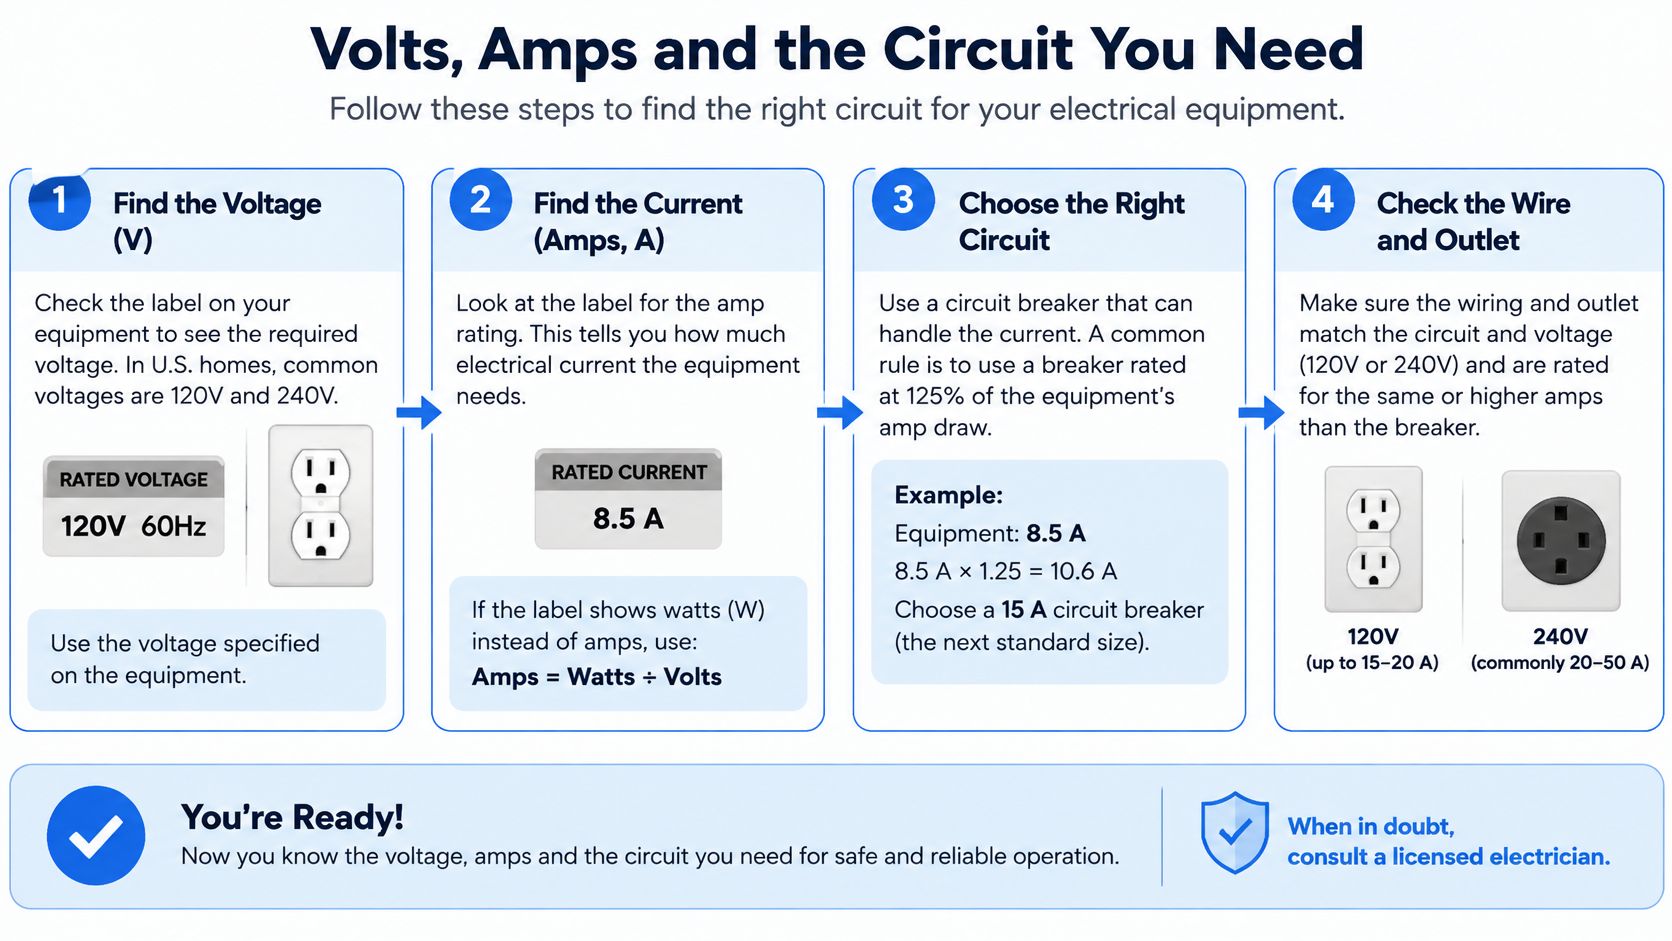
What the table can't decide for your property
The wire size shown isn't automatically right for every installation. A longer wire run may need a larger conductor to limit voltage drop. Conduit fill, surrounding temperature, and the temperature rating of the equipment terminals can also affect the allowable current and final wire choice.
Commercial service adds another consideration. At 208 volts, the same amperage delivers less power than it would at 240 volts, and the electrician must account for the actual service and building loads.
The decision sequence is straightforward:
Choose an EVSE amp setting the car can use.
Determine the breaker and conductor requirements for that setting.
Confirm that the panel has capacity for the added load.
Ask the electrician one direct question: Is the claimed spare capacity supported by a load calculation? A panel that appears to have room for a breaker doesn't, by appearance alone, establish that it can support the charger.
How Long a J1772 Charge Really Takes
A J1772 Level 2 charge doesn't have one fixed duration. The U.S. Department of Transportation estimates that a battery-electric vehicle can charge from empty to 80 percent in about 4 to 10 hours on Level 2, compared with roughly 40 to 50 hours on Level 1. For a plug-in hybrid, the corresponding Level 2 estimate is about 1 to 2 hours from empty to 80 percent, according to the Department of Transportation's EV charging-speed overview.
Those are practical ranges, not guarantees. Battery capacity, the car's onboard AC charger, temperature, starting state of charge, and any limit the car imposes all affect the result.
The table below is a simplified energy-divided-by-power estimate. It rounds the calculations and doesn't add an assumed charging-loss allowance. Actual times can be longer, and the figures only apply when the car can accept the amp setting shown.
Battery size | Energy to 80% | 32 A (7.7 kW) | 48 A (11.5 kW) | 80 A (19.2 kW) |
|---|---|---|---|---|
40 kWh compact EV | 32 kWh | About 4 h | About 3 h | About 2 h |
60 kWh mid-size EV | 48 kWh | About 6 h | About 4 h | About 3 h |
80 kWh large SUV or truck | About 64 kWh | About 8 h | About 6 h | About 3 h |
100 kWh large pickup | 80 kWh | About 10 h | About 7 h | About 4 h |
For example, a 60 kWh vehicle starting at 20 percent needs about 36 kWh to reach 80 percent. At 7.7 kW, the ideal calculation is a little under five hours; real charging may take longer. Many vehicles also reduce their charging rate as the battery approaches full, so charging beyond 80 percent can take disproportionately longer.
For another explanation of the variables involved, see this guide to Level 2 EV charger charging time.
Which Electric Cars Plug Into J1772
Wall unit and car pairing | Level 2 works? | Adapter needed | What to confirm |
|---|---|---|---|
J1772 wall unit with J1772 car | Yes | None | Most EVs and plug-in hybrids |
J1772 wall unit with NACS car | Yes | J1772 adapter | Adapter amp rating against the charger setting |
NACS wall unit with J1772 car | Yes | J1772 adapter | Adapter amp rating against the charger setting |
J1772 wall unit with CCS1 car | Yes, AC pins only | None | DC fast-charge pins aren't used at Level 2 |
Level 1 and Level 2 equipment use the SAE J1772 vehicle connector, while several vehicle manufacturers have announced NACS adoption beginning as early as 2025, according to the Department of Energy's electric-vehicle consumer guidance. The connector market is changing, but that doesn't make an installed J1772 Level 2 unit automatically obsolete.
J3400, commonly associated with NACS, and J1772 are both current North American connector standards. If a vehicle's port and the wall unit don't match, an appropriate adapter may bridge the connection. Before relying on one, check that it's compatible with the vehicle and charger and that its amp rating supports the intended charging rate.
AC charging and CCS1
A CCS1 port combines a J1772-style section for AC charging with additional pins for DC fast charging. At Level 2, the AC pins handle the connection; the DC fast-charge pins aren't used. The car still determines the maximum AC rate it will accept.
For a household choosing equipment, the question isn't only which connector fits today's car. Consider whether you may change vehicles, whether the charger can be replaced without reworking the circuit, and whether the wiring route can support future equipment. Future-proof the electrical pathway, not just the plug. For a workplace with a mixed fleet, planning for both connector types can help serve vehicles with different ports.
Installing a Level 2 Charger at Home or Work
Installation starts with two choices: what kind of charger connection you want and where the unit will sit. A plug-in setup uses a suitable receptacle and lets you remove or replace the charging unit more easily. A hardwired unit connects directly to the building's wiring, removes the receptacle as an extra connection point, and is common for higher-output installations, depending on the equipment.
Next, the electrician checks the route from the panel to the parking space. The distance, panel make and condition, available breaker spaces, and calculated electrical load all affect what the project needs. A panel can have open spaces and still lack enough capacity for another large load, so the electrician must assess the actual service and existing loads.
If the panel can't support the charger as planned
When a load calculation shows that the proposed charger setting won't fit, compare a service upgrade with load management. A service upgrade increases the electrical capacity available to the property. Load management adjusts charging output as other large electrical loads operate, which may allow a charger to work within the available capacity without immediately increasing the service.
The right option depends on the property and charging schedule. An electrician can assess whether either approach is suitable and whether the charger, panel, and other equipment are compatible with the proposed design.
Permits and inspections are part of the work, not optional finishing touches. Local municipal requirements vary, so confirm the applicable permit and inspection process before installation. A licensed electrician can prepare the electrical work and coordinate the required steps. For workplace charging, planning may also involve multiple ports, shared load management, user access, and clear signage.
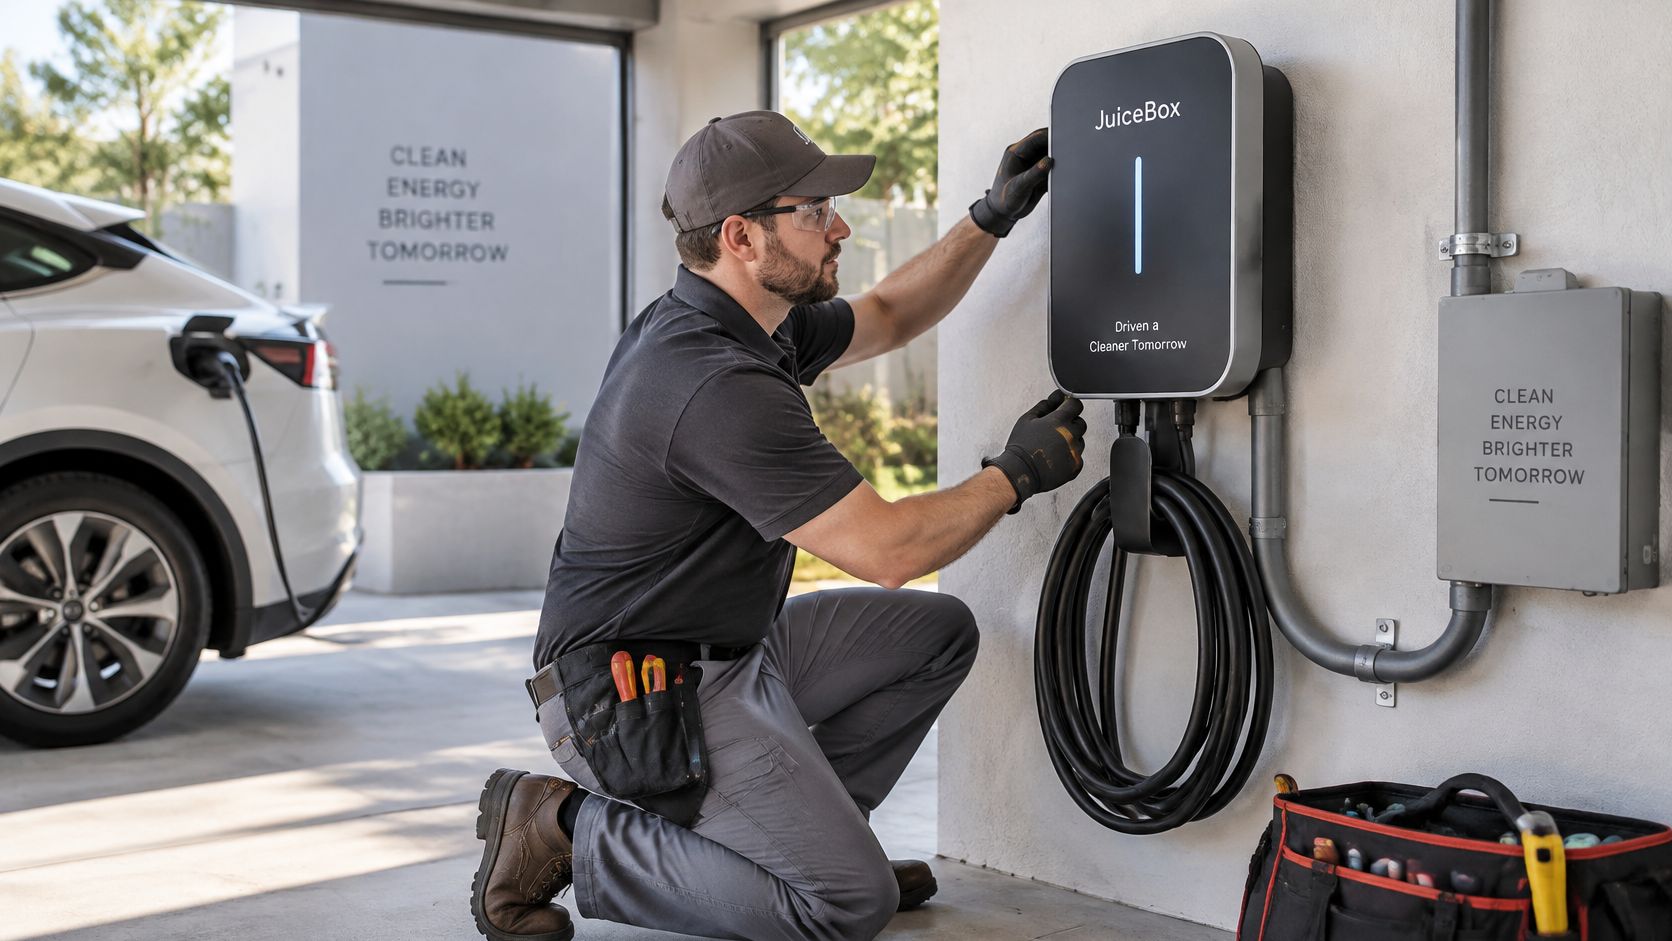
Before a site visit, gather a photo of the electrical panel, a recent utility bill, the vehicles you plan to charge, and the time you'd like them ready. Those details help the electrician assess the charging location and discuss a suitable circuit and installation path. For a more detailed overview of the process, see this guide to Level 2 EV charger installation.
Confirm Your Amp Rating Before You Buy
Use this decision sequence to avoid paying for a charging rate your car can't use or your property can't support.
Check the car's onboard AC charging limit. Look in the owner's manual or vehicle specifications. That limit is the maximum rate the car can accept from an AC wall unit.
Estimate your daily charging need. Multiply your daily miles by the vehicle's energy use, then consider how many hours the car is usually parked overnight.
Choose a rate that fits both. The right amp setting is the lower of the car's limit and the rate needed to replenish your routine within the available charging window.
Confirm the panel can support it. If the proposed circuit doesn't fit the property's calculated capacity, ask about load management before assuming a service upgrade is the only path.
As a planning example, a single commuter driving 40 miles a day at about 0.3 kWh per mile uses roughly 12 kWh. A car that can accept 7.7 kW could replenish that daily energy at a lower charging setting, such as 16 to 24 amps, if the available overnight hours are sufficient. A household with two cars capable of accepting about 11 kW each and limited charging windows may benefit from a higher-capacity installation and load sharing, if the electrical assessment supports it.
Amp'd Energy Solutions provides EV charger installation and site assessments for homes and businesses in Southeastern Pennsylvania. Before buying a unit, arrange an assessment to confirm the amp setting, circuit requirements, and permit path.
Talk with Amp'd Energy Solutions about a site assessment for your J1772 Level 2 charger, including the vehicle's charging limit, your panel capacity, and the installation route. The team installs home and workplace EV charging equipment and can help you plan a circuit that fits the property and your charging routine.
Comments