

Install Car Charger at Home
You've picked the charger, found a convenient spot on the garage wall, and maybe even scheduled delivery of the car. Then an electrician opens the panel and asks a less exciting question: what can the house safely support while the car is charging overnight?
That question determines far more than the charger brand. A successful home EV installation depends on panel capacity, continuous-load calculations, the route between the panel and parking space, local permits, and how your utility handles new electrical demand. In Southeastern Pennsylvania, a straightforward garage install can be very different from a charger fed through a stone foundation to a detached garage.
Table of Contents
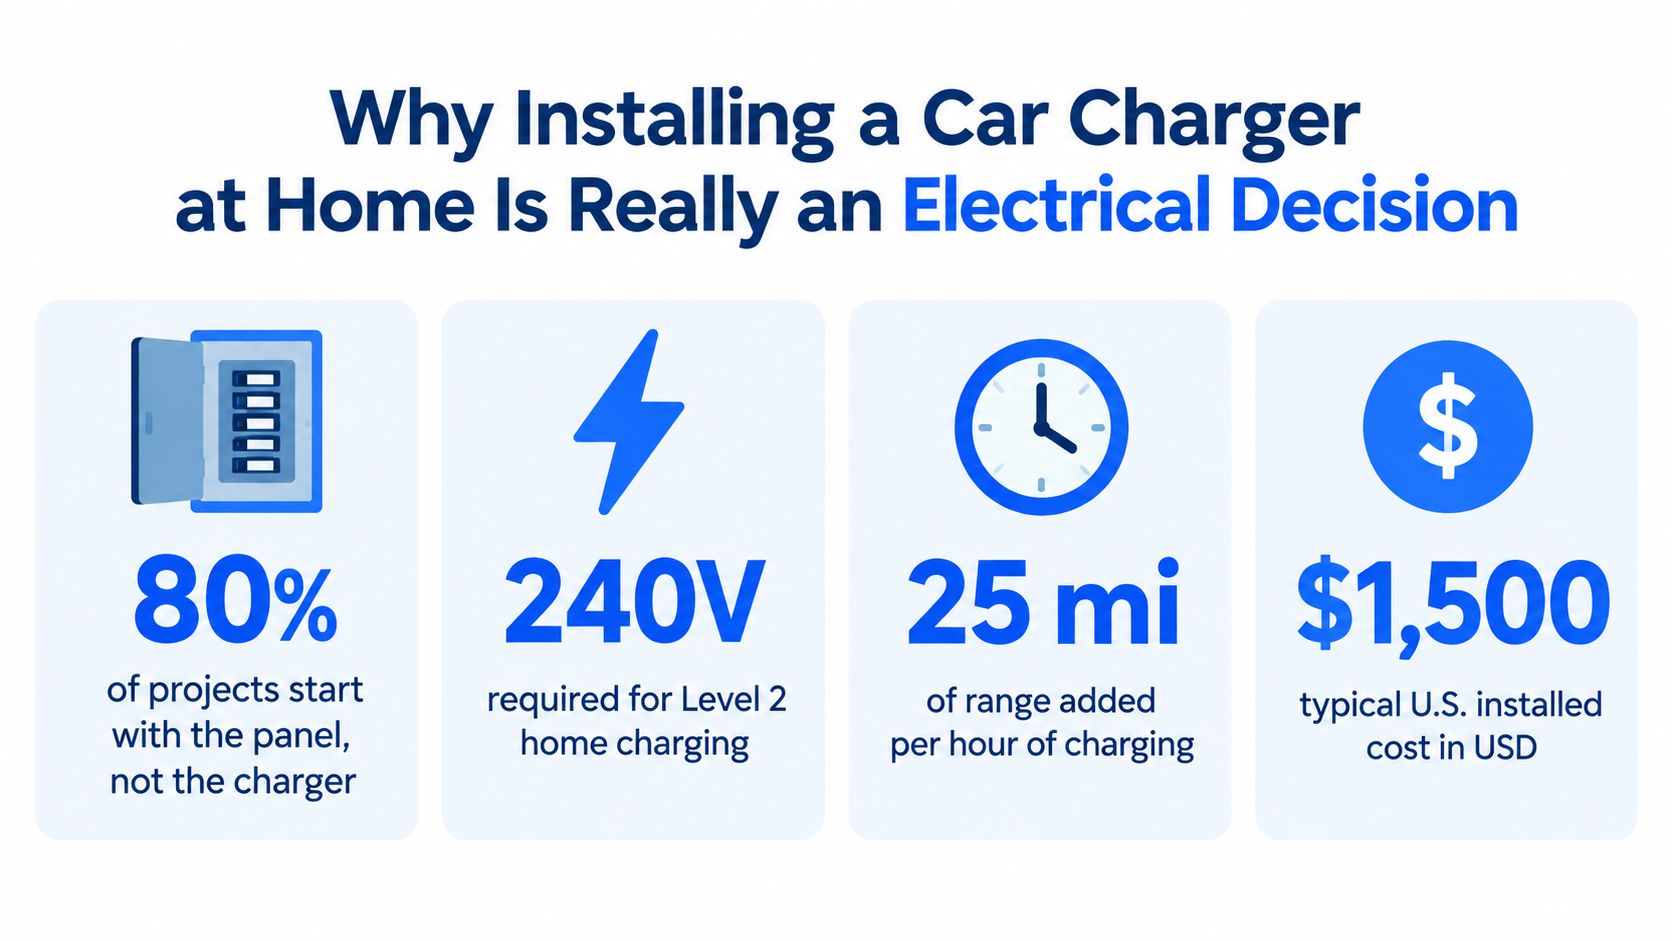
Why Installing a Car Charger at Home Is Really an Electrical Decision
Walking Your Property Before You Buy Anything - Start at the panel - Let the load calculation decide
Understanding 240-Volt Circuits and Charger Sizing - The breaker math matters
Permits, Inspections, and Southeastern Pennsylvania Coordination - What the inspector is checking
Planning the Physical Route From Panel to Parking Space - Map the route in sections - Plan for weather and the next project
When a Panel Upgrade Isn't the Only Answer - Compare the options honestly
Commissioning, Verification, and What to Expect on Install Day - The final test - Cost and timing depend on the route
Why Installing a Car Charger at Home Is Really an Electrical Decision
You buy a charger, plan to park in the garage, and expect an overnight installation. Then the panel, service rating, or route to the parking space changes the scope. The charger is only one part of a system that must coordinate the service, branch circuit, protection, wiring path, and vehicle location.
Home charging now forms a major part of EV infrastructure. The International Energy Agency's analysis of home charging estimated roughly 27 million home chargers operating worldwide in 2023, representing approximately 150 gigawatts of charging capacity. Under its Stated Policies Scenario, the global stock could exceed 270 million home chargers by 2035. Overnight charging suits many drivers because the vehicle replenishes while parked instead of requiring a public charging stop.
That convenience does not make the highest-output charger the right choice for every property. In Southeastern Pennsylvania, electric heat, water heating, cooking equipment, workshops, and pools can consume capacity that the service rating appears to leave available. An open breaker position is only physical space. It does not establish that the service can support another continuous load.
Practical rule: Buy the charger after the electrical assessment, not before it.
For many American homes, Level 2 charging requires a dedicated 240-volt circuit, suitable overcurrent protection, correctly sized conductors, and a route that protects the wiring from the panel to the parking space. A detached garage, masonry wall, long conduit run, or trench can affect the work as much as the charger's output. The IEA's overview of charging trends reports that home charging accounts for 83% of U.S. EV charging, so residential load planning has practical consequences.
The right installation serves daily driving, passes the local inspection process, and leaves room for later electrical decisions. That applies to new EV owners, charger replacements, remodels, detached-garage projects, and backup-power work. A wall-mounted box is the visible result. The actual project is managing electrical load safely along the entire route.
Walking Your Property Before You Buy Anything
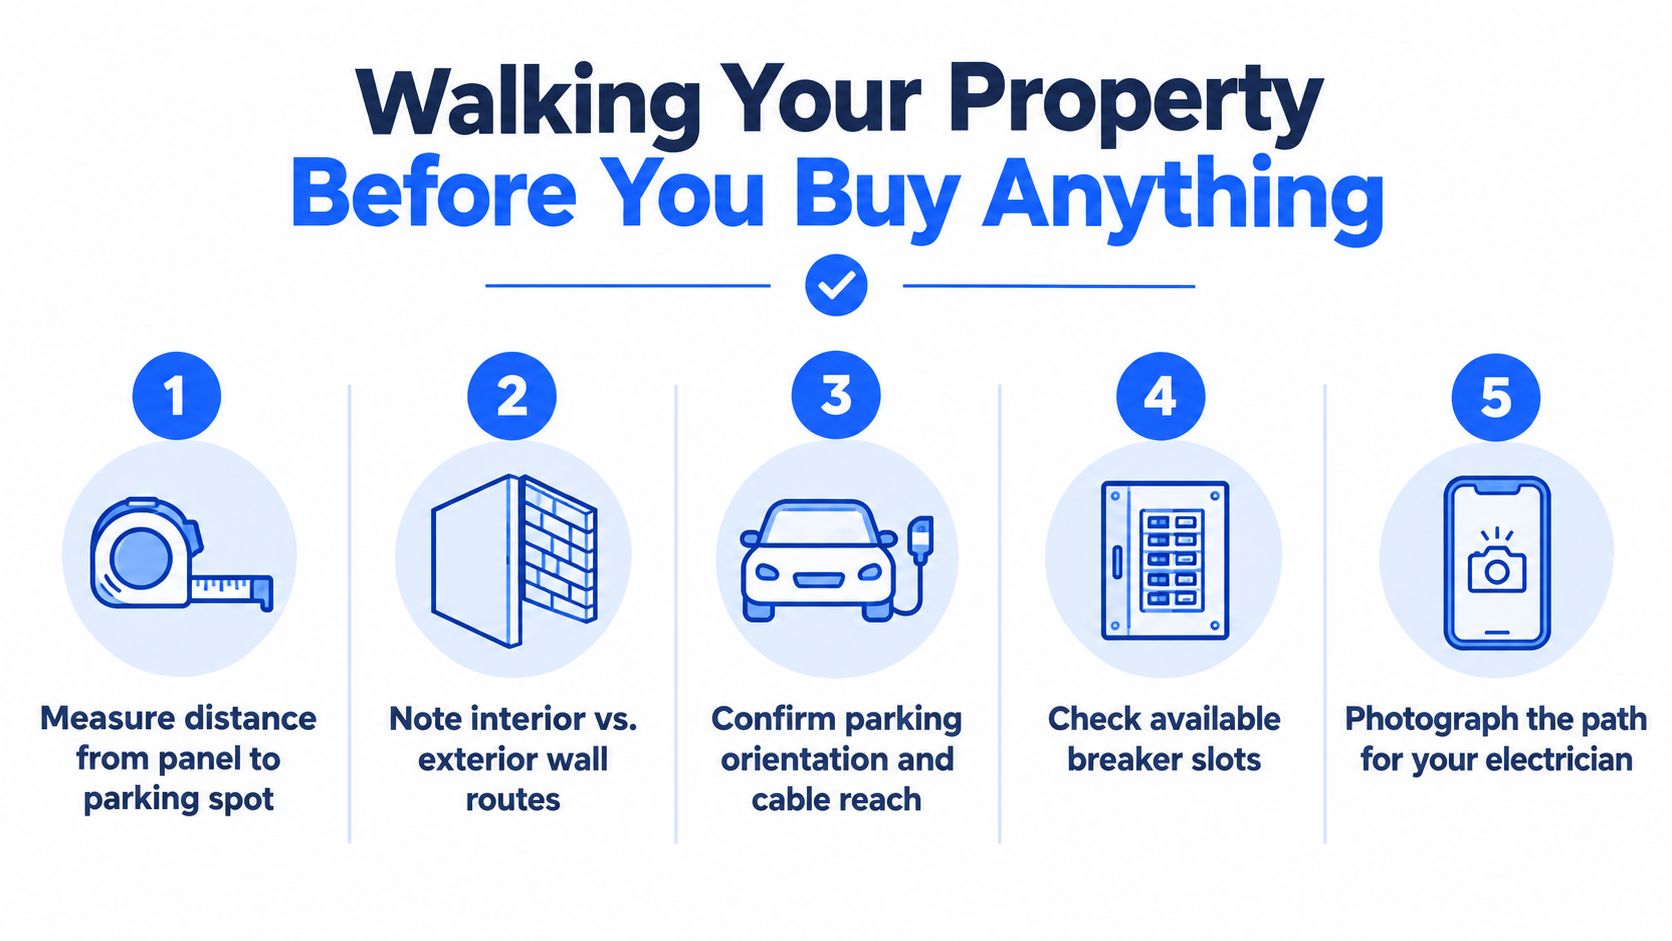
A useful site assessment starts outside the shopping cart. Walk from the electrical service to the vehicle and document every obstruction, surface, change in elevation, and ownership boundary. The distance and construction route can affect the project more than the charger itself.
Start at the panel
Find the main electrical panel and record its service rating if it is visible. Then look for:
Panel condition: Scorch marks, corrosion, heat damage, loose covers, overcrowding, or obsolete equipment deserve attention before adding a major load.
Available spaces: An open position may help, but it isn't approval. The whole service still needs a load calculation.
Existing demand: Electric resistance heat, water heating, cooking equipment, pools, workshops, and other large loads can change the answer.
Grounding and conductors: The electrician must verify the service, feeder, grounding, and conductor condition rather than assuming the installation matches the label.
Take clear photographs with the panel cover closed, then photograph the likely route from several angles. Don't remove the cover yourself. Your electrician needs enough information to plan the visit, but panel inspection is a professional task.
Next, measure the actual route, not just the straight-line distance. A cable may need to travel across a basement ceiling, through a masonry wall, along an exterior surface, down to grade, and then into a detached garage. Mark doors, windows, walkways, driveways, drains, retaining walls, and areas where vehicles could crush or snag a cable.
Let the load calculation decide
ENERGY STAR presents the practical sequence as choosing Level 1 or Level 2, selecting the charging location, checking electrical capacity, and scheduling installation. That order prevents a common mistake: treating charger output as the starting point.
The ENERGY STAR home electrification guidance supports a whole-home load calculation. The electrician considers the service rating and the actual demand from existing equipment, then compares that demand with the proposed EV load. A 200-amp service may support the charger, but it may also require managed charging or a different charging current if the home already carries substantial electric loads.
Older Southeastern Pennsylvania properties create additional variables. Stone foundations can make routing slow and invasive. Plaster walls may need careful access and repair. A detached garage may involve trenching, a separate structure grounding plan, or shared-driveway permissions. If the parking area is controlled by a condominium, landlord, association, or another property owner, confirm authorization before equipment is ordered.
Understanding 240-Volt Circuits and Charger Sizing
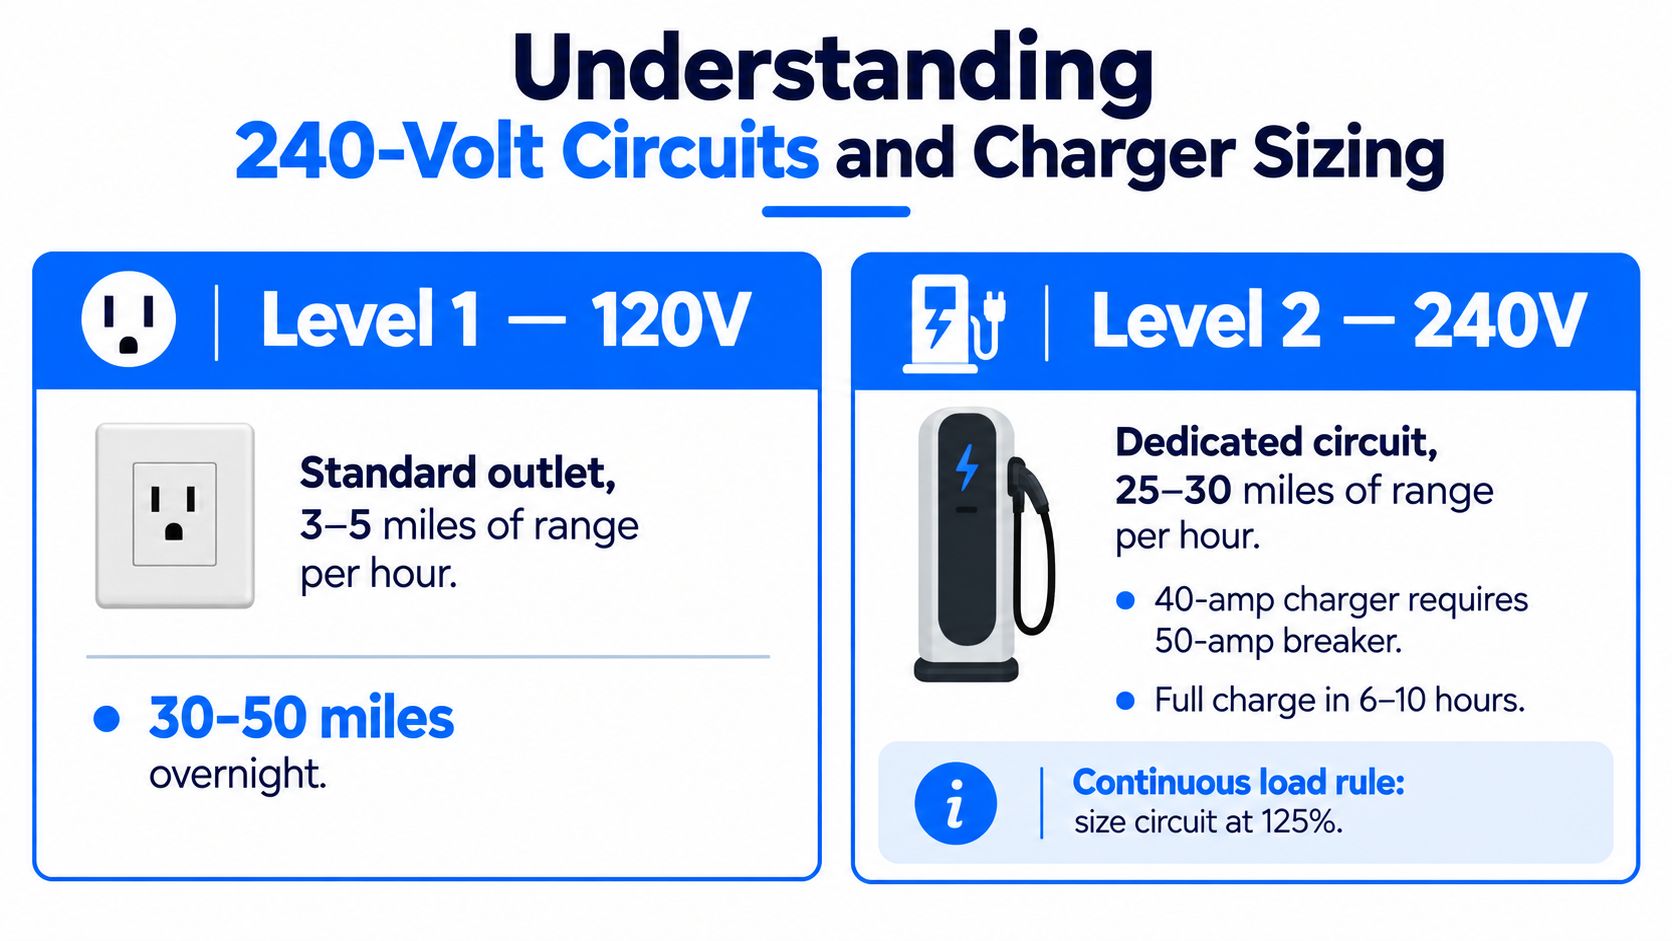
Level 2 charging uses 240-volt AC charging, similar in voltage to the circuit serving a household electric dryer. The U.S. Department of Energy explains that Level 2 equipment can add approximately 12 to 80 miles of driving range per hour, depending on the vehicle, charger output, and system conditions. Read that guidance with the vehicle and charger specifications, because the car may accept less power than the equipment can provide.
Level 1 uses a standard 120-volt receptacle. It can suit low daily mileage, a temporary setup, or a home where a dedicated higher-power circuit is not practical. Residential charging guidance notes that ordinary socket charging can work more effectively in regions with household voltage of 220 volts or more. In the United States, 100 to 120-volt charging is much slower, and an unsuitable circuit can create safety concerns during sustained EV loads.
The breaker math matters
EV charging is a continuous load. The branch-circuit rating should be at least 125% of the charger's rated current, as described in ENERGY STAR's EV-ready construction guidance. A charger configured to draw 40 amps therefore normally requires a dedicated 50-amp circuit. A 40-amp breaker cannot serve a 40-amp continuous charging load under that calculation.
Set the charging output according to the vehicle's routine, parking time, and available electrical capacity. A lower setting may replace a day's driving while avoiding unnecessary service work. A higher setting may help when the vehicle returns with a low battery and must be ready again quickly, but it uses more of the home's available capacity.
Hardwired equipment removes the receptacle as a connection point and suits a permanent installation. A plug-connected unit may simplify removal or replacement, but the receptacle, enclosure, plug, and circuit still require ratings suitable for continuous EV charging. The electrician should verify conductor sizing, overcurrent protection, grounding, charger settings, and applicable GFCI requirements.
For a practical explanation of the relationship between charging output and circuit size, see this guide to Level 2 EV charger amps. Sales specifications should not determine the circuit. The home's capacity, the vehicle's limits, the parking schedule, and local inspection requirements determine the appropriate amperage.
Permits, Inspections, and Southeastern Pennsylvania Coordination
A new Level 2 circuit is electrical work, not just appliance installation. In Southeastern Pennsylvania, the local authority having jurisdiction determines the permit and inspection process. Requirements can vary by municipality, so the contractor should identify the correct permitting office before work begins.
The permit package may require equipment information, a basic site or routing description, and details about the electrical service. Municipal guidance commonly expects documentation showing that the existing service can support the additional load. If the work includes a panel replacement or service change, the project may need broader review than a charger circuit installed in an existing panel.
What the inspector is checking
The final inspection isn't a visual approval of the charger brand. The inspector may verify:
Circuit sizing: The breaker, conductors, and charger settings agree with the continuous-load calculation.
Protection: Grounding, bonding, disconnecting means, and GFCI protection are provided where required.
Installation quality: Conduit, fittings, penetrations, weatherproofing, and mounting are suitable for the location.
Equipment listing: The charging equipment is approved by a recognized testing laboratory. EPA specifically identifies UL or ETL approval as a useful safety-screening criterion.
Documentation: Labels, permit records, and inspection approval are complete.
The EPA's home charging guidance recommends professional installation for a new circuit and notes that permits and inspections may be required. The electrician should pull the permit when the contractor is responsible for the electrical work, not leave the homeowner to guess which office handles it.
Utility coordination becomes more relevant when the project involves a service upgrade, a significant service change, or a question about available supply. Homeowners in PECO, Met-Ed, or PPL territories should ask the contractor whether utility notification or coordination is needed for the proposed work. Utility review and municipal approval are separate steps, and either can affect scheduling.
Don't confuse a delayed inspection with a failed installation. A permit may be issued before the work, followed by inspection after the circuit is complete. If the inspector identifies a correction, the electrician should document the fix and arrange the required reinspection. Homeowners considering broader electrical work can also review this guide to electrical panel replacement permits.
Planning the Physical Route From Panel to Parking Space
The charger may be mounted in five minutes on a drawing. The main project is the route from the service equipment to the vehicle.
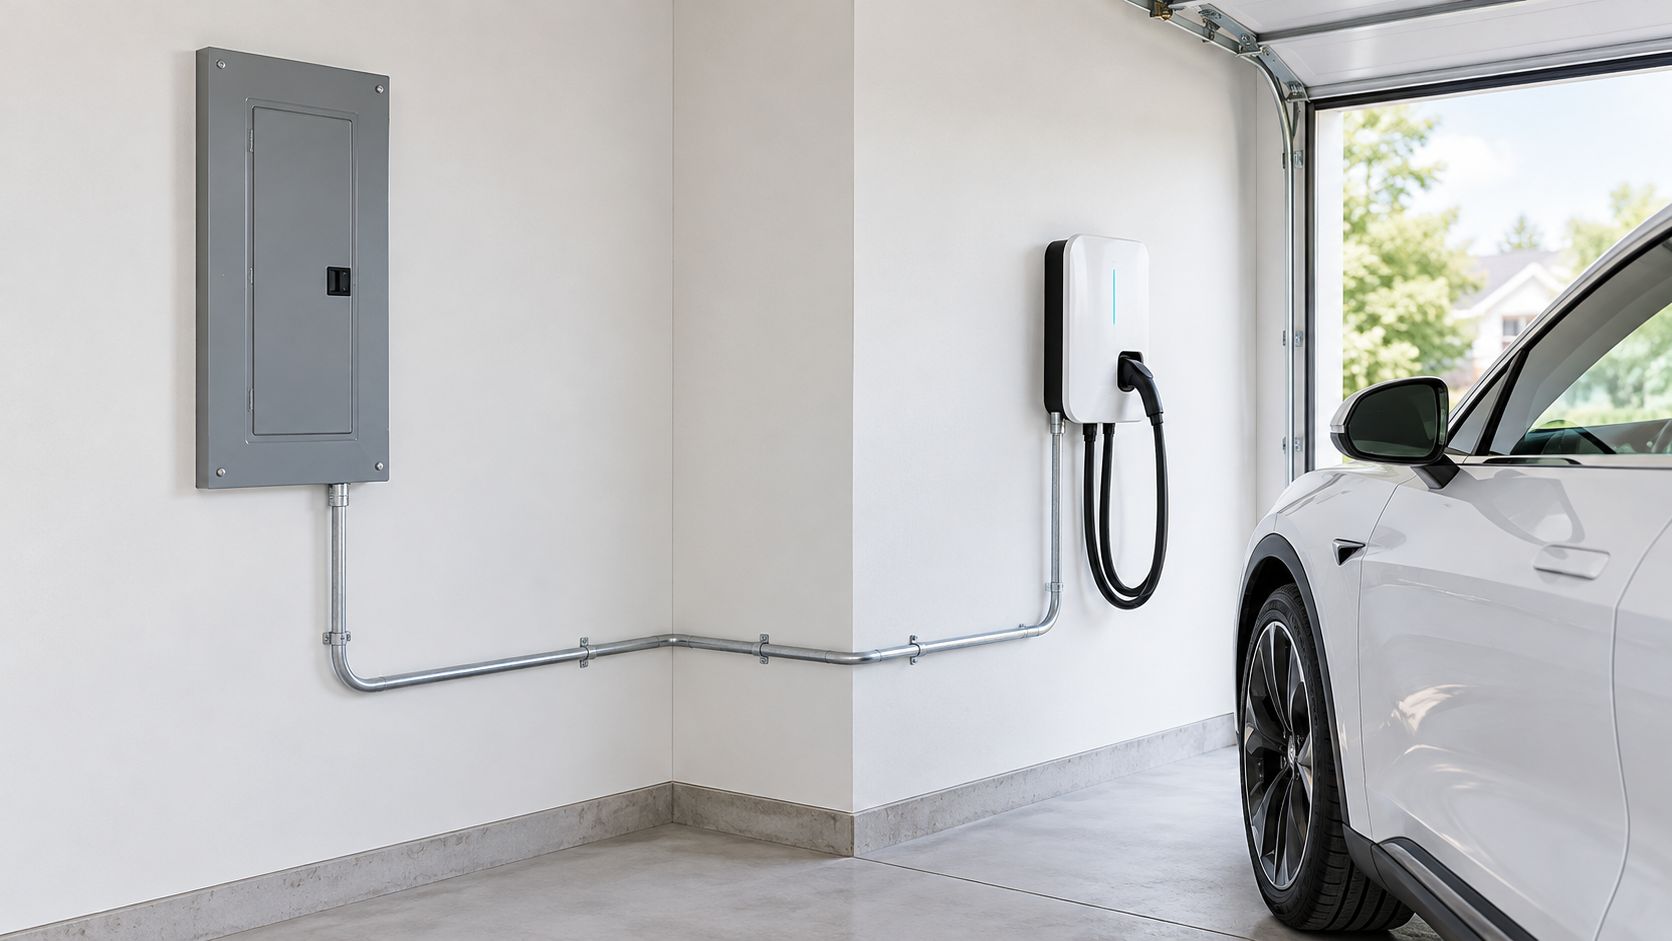
A charger close to the panel usually requires less conduit, fewer penetrations, and less labor. The U.S. Department of Energy explains that placing the charger closer to the electrical panel can reduce infrastructure and installation costs because longer conduit runs, materials, and trenching increase project complexity. Its guidance also recommends early coordination with the local jurisdiction when site plans or electrical, fire, or environmental review could apply.
Map the route in sections
For an attached garage, the cleanest path may be surface-mounted conduit along an unfinished wall or ceiling. Finished basements, plaster, tile, and masonry can change that approach. A professional may choose an exterior route, a carefully placed interior access point, or a different charger position to avoid unnecessary wall damage.
A detached garage requires more planning. The electrician must determine whether the feeder route runs overhead or underground, identify private utility lines, assess trenching surfaces, and verify the detached structure's electrical arrangement. A shared driveway creates another issue: the person who owns or controls the route may need to approve excavation or visible conduit.
A long run isn't just a material problem. Voltage drop, conductor sizing, physical protection, weather exposure, expansion, bends, and serviceability all need attention. Outdoor equipment should be weatherproof, and the cable should reach the vehicle without lying across a walking path or creating a crush point beneath tires.
Plan for weather and the next project
ENERGY STAR's EV-ready guidance places the charging station between 18 and 48 inches above the floor or grade. The same guidance recommends reserving capacity for at least a 40-amp, 240-volt dedicated branch circuit and installing conduit from the electrical equipment to the planned charging position during new construction or major remodeling.
That doesn't mean every existing home should install oversized infrastructure immediately. It does mean the route should be documented. A future second EV, battery storage system, generator connection, or remodel can be easier to coordinate when the existing conduit, panel location, and penetrations are recorded.
For a detached garage, ask the contractor to show the route on the proposal. It should identify the panel, parking position, conduit path, structure crossings, trenching responsibility, surface restoration, and charger mounting location. If the quote says only “install EV charger,” it leaves too much of the physical scope undefined. A project-specific discussion of Level 2 charging outlets can help clarify whether a receptacle or hardwired arrangement fits the site.
When a Panel Upgrade Isn't the Only Answer
A tight panel doesn't automatically mean a full replacement. The safe answer depends on the calculated load and the way the vehicle will be charged.
Managed charging can reduce simultaneous demand by delaying charging, limiting output, or responding to the home's electrical conditions. A 2025 field experiment summarized by the Federal Reserve Bank of Dallas found that managed charging reduced coincident peak charging by 17% compared with unmanaged charging and 33% compared with a time-of-use group. Those findings don't approve a charger for a particular home, but they show why charging control belongs in the design conversation.
Compare the options honestly
Suppose a homeowner has an existing service that looks crowded after the load calculation. The vehicle sits at home overnight, daily driving is moderate, and the owner doesn't need maximum charging output every evening. A lower charging current, scheduled charging, or a load-management device may keep the project within the existing service.
That solution works only when the controls are compatible with the charger, vehicle, electrical system, and household routine. The contractor must verify that charging won't exceed the configured circuit or create unsafe simultaneous demand. A time-of-use rate can influence when charging is cheapest, but the homeowner still needs to confirm the actual utility tariff and whether the vehicle must be ready by a fixed morning departure.
A panel or service upgrade becomes more appropriate when the equipment is obsolete, damaged, lacks adequate grounding, has no practical protection arrangement, or cannot support the required load even with management. It may also be the right choice when the homeowner is already planning electric heat, storage, a generator, or another substantial load.
Ask for alternatives: A professional quote should explain why a panel upgrade is necessary, and whether lower charging current or managed charging was evaluated.
The cheapest installation isn't always the lowest-cost ownership choice. A higher-power charger can increase peak demand, while managed scheduling may reduce bill exposure and postpone major electrical work. On the other hand, choosing a control strategy that doesn't match the household's driving schedule can create daily frustration. Safety, availability, operating cost, and future plans all belong in the decision.
Commissioning, Verification, and What to Expect on Install Day
Installation day should end with more than a powered-up display. The electrician needs to verify the complete circuit, configure the equipment correctly, and prove that the vehicle can charge under the intended conditions.
Before energizing the charger, the crew should confirm conductor ampacity, breaker rating, termination torque, grounding, voltage, polarity, and the physical security of the conduit and equipment. GFCI requirements should be checked for the specific installation. Outdoor work also deserves a close look at fittings, covers, seals, and cable support.
The final test
A proper commissioning sequence includes:
Inspecting connections for secure terminations and correct torque.
Measuring electrical conditions at the circuit and charger.
Confirming configuration so the charger doesn't draw more current than the circuit allows.
Testing protection and any applicable GFCI function.
Starting an actual charging session with the vehicle.
Checking for abnormal heat, faults, or communication problems during the test.
Recording the final settings for future service.
The installer should explain the charger's controls, scheduling features, fault indicators, and emergency shutoff procedure. Keep the permit approval, electrical certificate, equipment information, configured amperage, circuit details, and route photographs together. That file helps a future electrician understand the installation before modifying the panel or adding another load.
Cost and timing depend on the route
A short, accessible run near a suitable panel is usually a simpler project than a detached-garage installation requiring masonry work, exterior conduit, or trenching. The contractor should separate charger equipment, circuit installation, permit work, excavation, surface restoration, panel work, utility coordination, and inspection-related tasks in the proposal.
A straightforward installation may fit into one site visit after approvals are complete. A long run, service upgrade, trench, or utility-related change can require multiple visits. Don't accept a vague promise that every installation takes the same amount of time. The route and electrical condition determine the schedule.
Before the crew arrives, clear the panel area, identify the intended parking position, confirm who can approve wall or driveway work, and make sure the vehicle is available for commissioning. Ask for the final configured amperage and documentation before the project is closed.
Amp'd Energy Solutions evaluates the electrical capacity, route, dedicated circuit, panel condition, and inspection requirements before installing a home charger. Visit Amp'd Energy Solutions to request a Southeastern Pennsylvania site assessment and plan a charger installation that fits both your vehicle and your home.
Comments