

Dedicated Circuit Installation: A Complete Guide
You plug in the Level 2 charger, start the shop vacuum, and the garage goes dark. The breaker has tripped again. That nuisance trip isn't random. Two demanding loads are competing for a circuit that was never designed to serve both at the same time.
A dedicated circuit installation can solve the branch-circuit problem, but it doesn't automatically solve the whole home's capacity problem. The right job starts with the appliance nameplate, the panel, the service, the cable route, and the local inspection requirements. For EV charging especially, the practical question isn't how to install the largest charger available. It's how much charging speed your driving requires and how much capacity your home can safely provide.
Table of Contents
What a Dedicated Circuit Really Does in a Home - Loads that commonly need their own path
Planning the Project Before You Open a Panel - The paper checks that prevent expensive rework
Sizing the Breaker, Wire, and Conduit the Right Way - Why a 40-ampere circuit may still be the right answer - Material decisions that affect the finished circuit
Matching the Circuit to the Appliance You Own - EV charging speed versus household capacity
Routing Cable, Mounting Boxes, and Prepping the Panel - Select the wiring method for the environment - Panel workmanship matters
When a Panel Upgrade Is Not the Only Option - What managed charging changes
Testing, Commissioning, and Knowing When to Call a Pro - Commission the circuit under a representative load - Use this handoff checklist
What a Dedicated Circuit Really Does in a Home
A shared household circuit feeds several outlets, lights, or appliances from one breaker. If the charger, shop vacuum, freezer, and garage receptacle all sit on that circuit, their combined demand travels through the same conductors and protective device. When the load exceeds what the circuit can safely carry, the breaker opens. That interruption is inconvenient, but it prevents the wiring from carrying an unsafe current for too long.
A dedicated branch circuit gives one appliance or one piece of equipment its own path from the panel. One breaker protects that path, the conductors are selected for the equipment, and no unrelated receptacle can consume the circuit's available capacity. The arrangement doesn't make the appliance use less electricity. It removes competing loads from the same branch circuit.
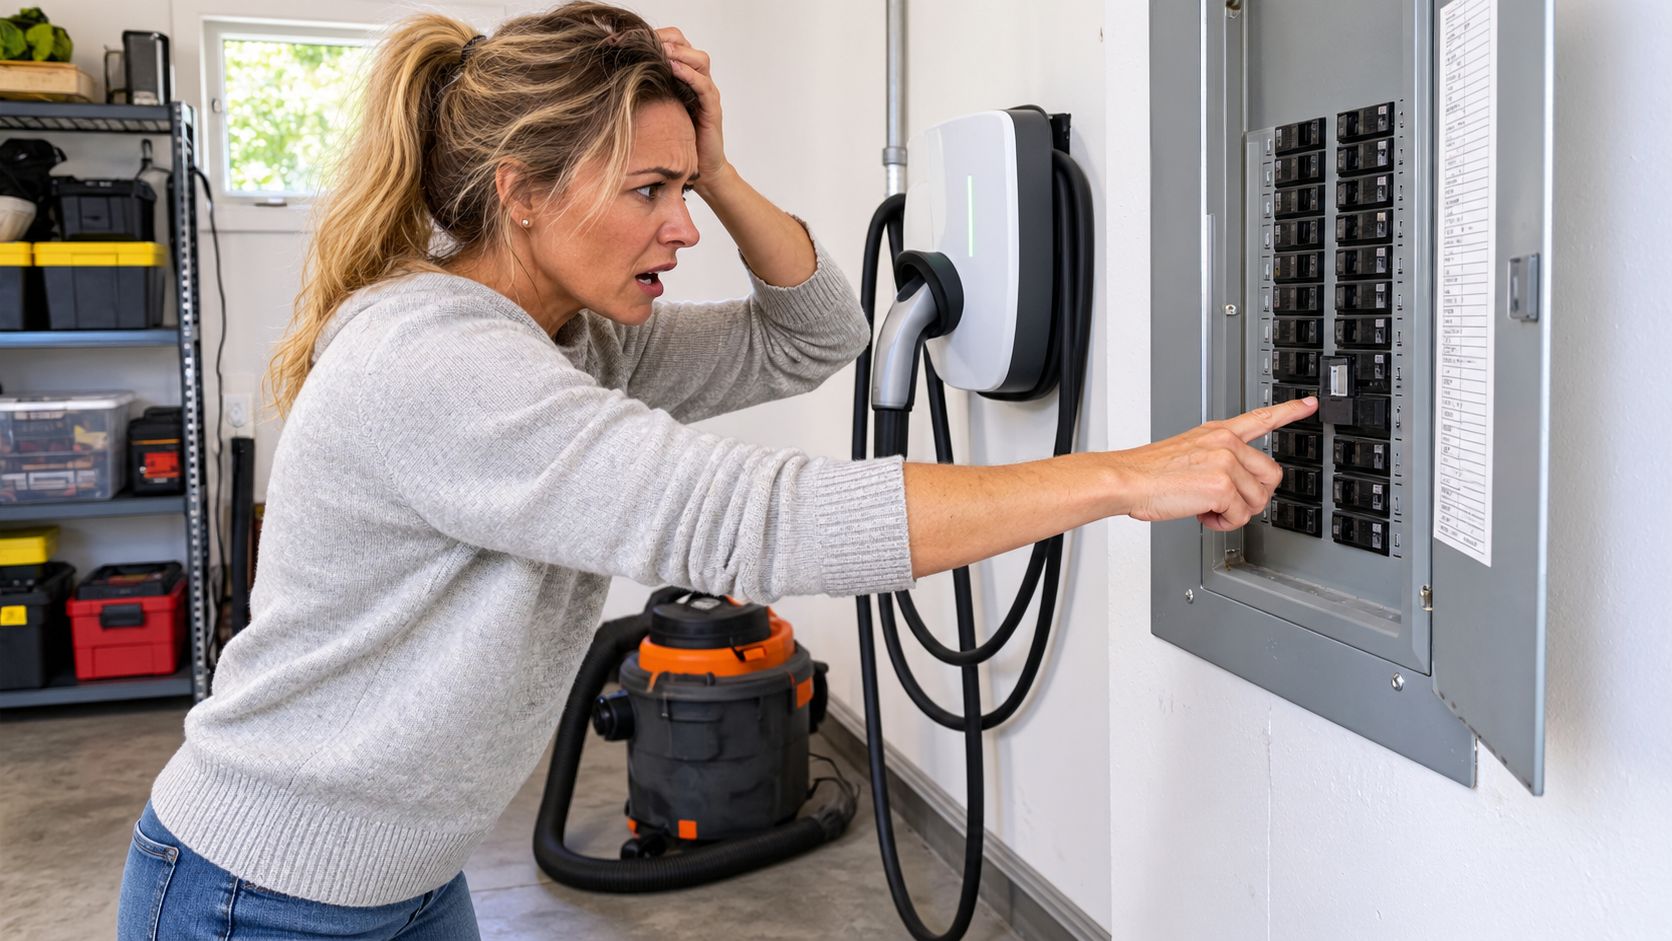
Loads that commonly need their own path
A Level 2 EV charger is a clear example because it can draw substantial current for an extended charging session. A tankless water heater, electric range, window air conditioner, microwave, freezer, workshop compressor, or similar equipment may also justify dedicated capacity, either because the equipment instructions require it or because shared use creates nuisance trips and voltage problems.
The diagnosis usually starts with behavior:
The same breaker trips repeatedly: The connected equipment may be overloading the branch circuit, or the circuit may have a fault that requires separate investigation.
You unplug one appliance to run another: That workaround signals that the loads are competing for limited branch-circuit capacity.
A new high-demand appliance is being added: Plan its circuit before installation rather than connecting it to the nearest convenient receptacle.
The equipment has a specified connection: A nameplate may call for a dedicated circuit, a particular voltage, hardwiring, or a specific overcurrent-protection rating.
Practical rule: A dedicated circuit protects the branch circuit. It doesn't prove that the service or panel can accept another large continuous load.
A sound project moves in order. First identify the equipment. Then calculate the home's load, confirm panel and service capacity, select the breaker and conductors, plan the route, install and protect the wiring, test the finished circuit, and coordinate the permit and inspection. That workflow matters more than finding an unused breaker position.
Planning the Project Before You Open a Panel
Don't start by buying a breaker. Start with the equipment.
Read the nameplate and installation instructions for voltage, maximum current, connection method, and required protection. A charger might be configured for a particular output even though the equipment family supports several settings. A water heater or air handler may list separate requirements for overcurrent protection, conductor size, disconnecting means, and grounding.
Next, calculate the existing dwelling or facility load. An open space in the panel only tells you that a physical position may be available. It says nothing about the service rating, feeder capacity, bus rating, or demand created by electric heating, cooking, water heating, HVAC equipment, batteries, generators, and other large loads.
The paper checks that prevent expensive rework
A proper pre-installation review should answer these questions:
What does the equipment require? Record the nameplate voltage, maximum continuous current, and whether the connection is a receptacle or hardwired.
What does the home already use? Include major existing and planned loads rather than judging capacity from breaker-space availability.
What does the adopted code require? The National Electrical Code provides a baseline, but the local authority having jurisdiction may adopt amendments or apply administrative requirements.
Can the panel and service support the design? Verify service, feeder, panelboard, and bus ratings, along with breaker compatibility.
How will the cable reach the equipment? Identify walls, joists, crawl spaces, finished surfaces, exterior exposure, physical-damage risks, and fire-stopping needs.
What paperwork is required? Confirm the permit, inspection, equipment listing, and any utility or manufacturer conditions before work begins.
Local interpretation matters in Southeastern Pennsylvania. A general code explanation can't replace the requirements enforced by the specific municipality or authority having jurisdiction. Confirm those requirements before opening the panel, particularly when the project involves EVSE, load management, a service change, or work near existing backup equipment.
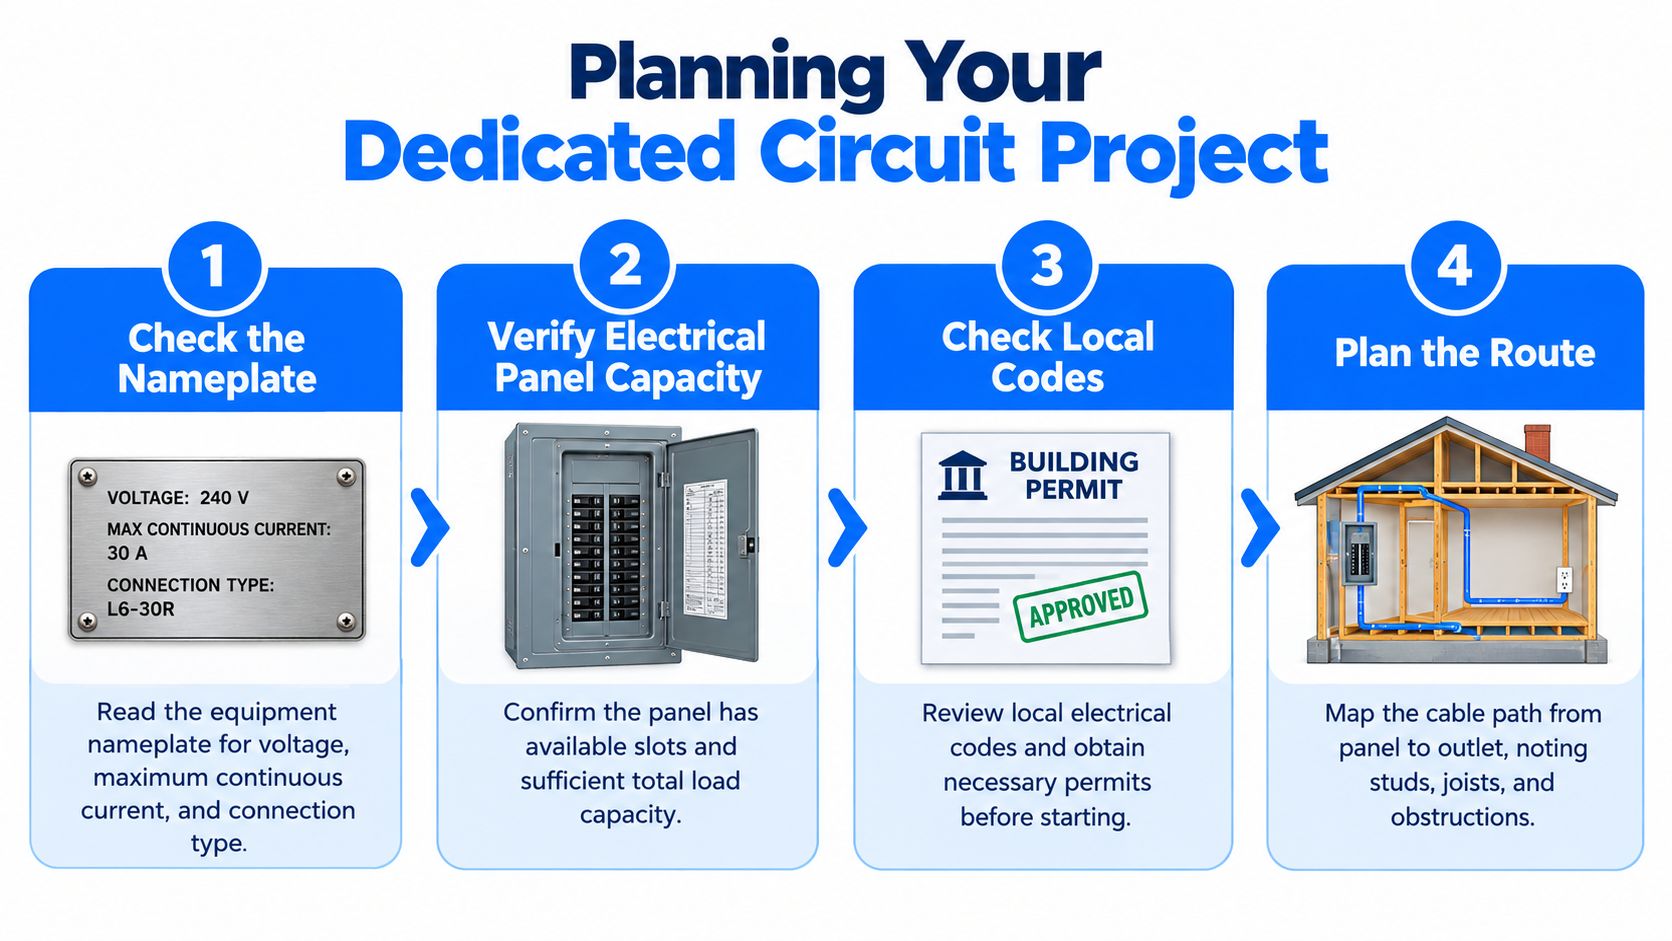
Keep a small project file with the equipment specification sheet, panel photographs and directory, load-calculation worksheet, proposed circuit schedule, cable route, and permit information. A concise one-line method statement can show the inspector how the circuit runs from the panel to the disconnect, receptacle, or EVSE.
For EV-specific planning, the EV charger installation requirements guide can help organize the questions, but the final design still belongs to the installer and the local authority.
Sizing the Breaker, Wire, and Conduit the Right Way
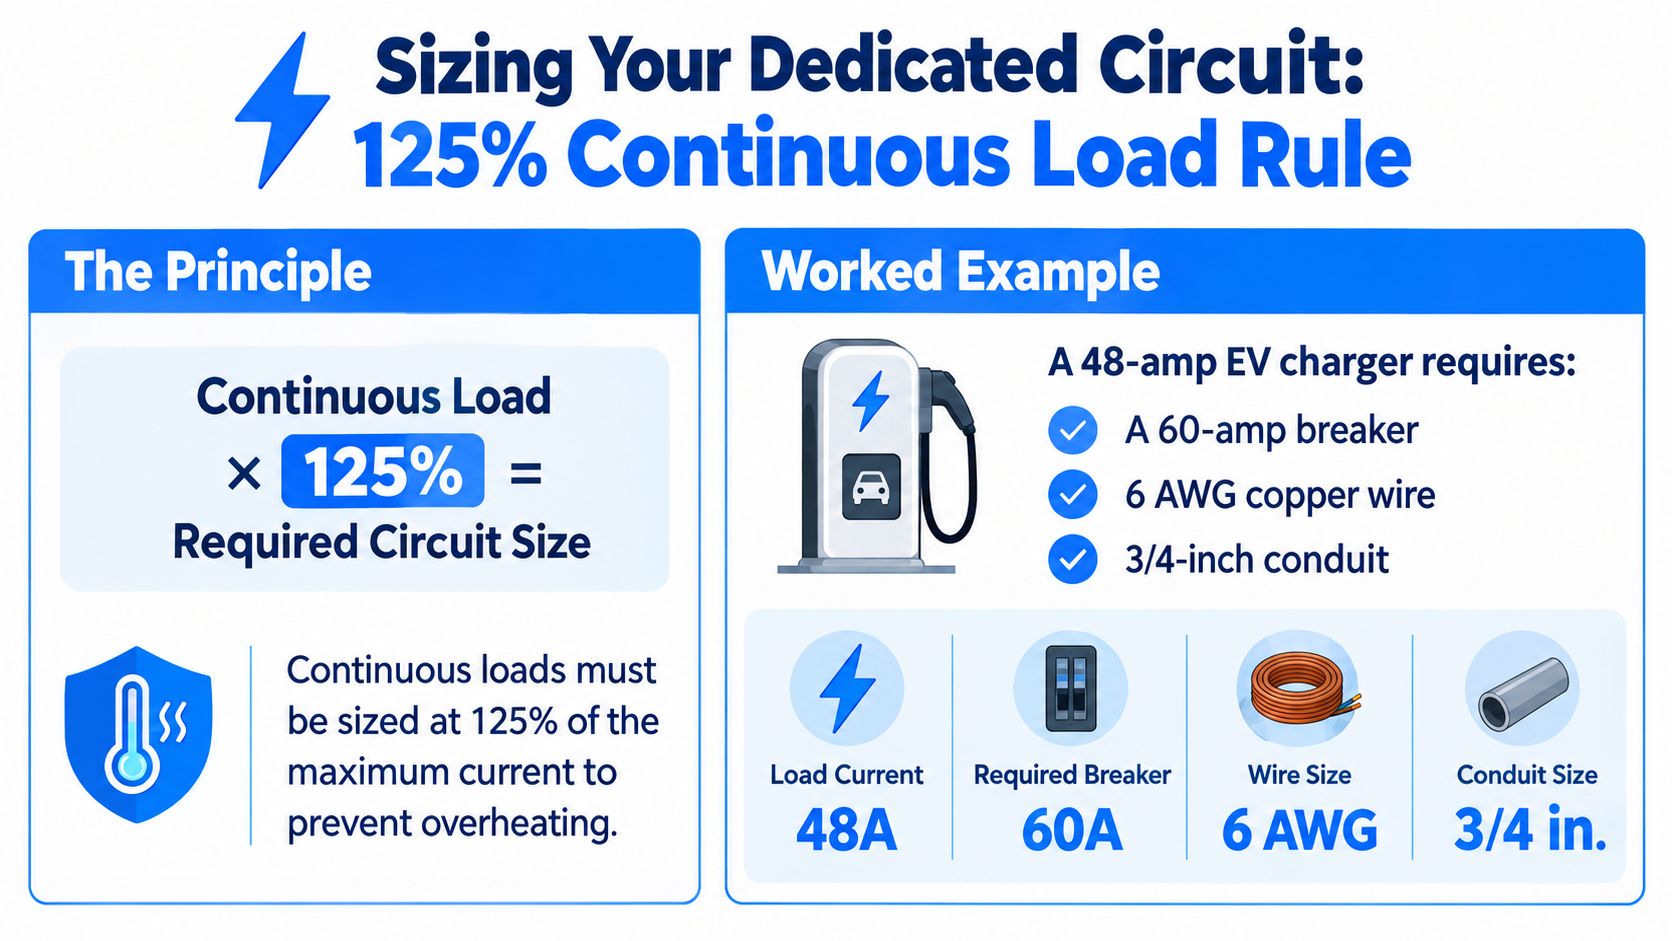
Dedicated circuit sizing begins with the equipment's maximum current, not with a convenient breaker size. EV charging is generally treated as a continuous load, so the branch circuit must be sized for the maximum current over an extended period. The design principle is to apply 125% of the continuous load when selecting conductors and overcurrent protection, subject to the adopted code, equipment listing, conductor ampacity, termination temperature limits, and installation conditions.
For a 48-ampere Level 2 charger, the calculation is direct:
48 amperes × 125% = 60 amperes
That means the charger typically points to a 60-ampere branch circuit. The conductor selection still requires a real ampacity review. The installer must account for conductor material, insulation rating, terminal limitations, ambient conditions, raceway fill, adjustment factors, and the equipment listing. A breaker and wire aren't selected independently.
Why a 40-ampere circuit may still be the right answer
Federal building-energy guidance uses a 40-ampere, 208/240-volt dedicated branch circuit as a baseline electrical scope for one- and two-family residential Level 2 charging installations, terminating at a receptacle, junction box, or EVSE. See the federal EV charging technical brief for that reference point.
That baseline doesn't mean every charger draws 40 amperes. A charger configured below the circuit's full rating can fit within the continuous-load design. A higher-output unit may require a larger circuit. The nameplate and configuration control the design.
Material decisions that affect the finished circuit
Copper or aluminum conductors: Either may be suitable when permitted by the equipment, terminals, installation method, and local code. Aluminum requires compatible listed terminations and careful preparation.
Receptacle or hardwire: A receptacle makes equipment replacement convenient, but the receptacle, plug, box, grounding, and protection must match the circuit. Hardwiring can reduce connection points, but the equipment still needs an appropriate disconnecting arrangement where required.
GFCI and AFCI protection: These protections depend on location, equipment, circuit type, and the adopted code. They aren't interchangeable with dedicated-circuit capacity.
Conduit selection: Raceway size must accommodate the conductors and fill rules, with bends, bushings, support, and physical protection considered before installation.
Breaker compatibility: The breaker must be listed and approved for the specific panelboard. A breaker that fits physically isn't automatically acceptable electrically.
For load-assessment details, use the electrical load assessment calculations guide. The useful habit is to show the calculation and the assumptions, not just write a breaker number on a quote.
Matching the Circuit to the Appliance You Own
Start with the appliance nameplate, then compare its demand with the service capacity already committed in the home. A larger breaker is not automatically a better installation. It can require heavier conductors, larger raceway, and more panel capacity without improving performance.
Appliance | Typical Breaker | Wire Gauge | Receptacle / Termination | Continuous Load |
|---|---|---|---|---|
Level 2 EV charging | Commonly 20 to 60 amperes, based on charger output and 125% sizing | Based on calculated ampacity and installation conditions | Listed receptacle or hardwired EVSE | Generally treated as continuous |
Electric range | Typically 40 to 50 amperes for common nameplates, verify the appliance rating | Based on calculated load and equipment requirements | Listed range receptacle or hardwired connection | Follow equipment and code requirements |
Tankless water heater | Often two to four double-pole breakers, verify the nameplate | Based on calculated load and terminal limits | Usually hardwired with required disconnecting means | Follow equipment instructions and code |
Heat pump air handler | Based on the nameplate and supplemental heat configuration | Based on calculated ampacity | Listed disconnect or equipment connection | Follow nameplate and HVAC requirements |
Workshop subpanel | Based on the calculated feeder load | Based on feeder ampacity and voltage drop considerations | Feeder termination at subpanel | Demand depends on connected loads |
These ranges are reference points, not permission to select a breaker from a table. The nameplate, installation instructions, conductor material, insulation, route, terminations, temperature limits, and calculated load determine the final design. A breaker and receptacle must match those conditions as well.
EV charging speed versus household capacity
A lower-power Level 2 charger can suit a home that does not need maximum charging output. Lawrence Berkeley National Laboratory describes charging at around 240 volts and 16 to 24 amperes, or 2.9 to 5.8 kilowatts, as an option for some homes. Managed charging can also keep household demand below a defined panel limit. Those figures appear in the low-power EV charging recommendations.
Daily mileage and the available charging window matter more than the charger's maximum rating alone. Battery size, winter conditions, and other simultaneous loads also affect the choice. Overnight charging may make a lower-amperage circuit practical, while a high-mileage driver may need greater output.
Compare the required energy, charging time, and existing service demand before deciding on equipment. Right-sizing the charger can avoid unnecessary infrastructure work while still meeting the vehicle's routine needs. If the calculated load leaves too little capacity, the answer may be managed charging or a slower Level 2 circuit rather than an immediate panel upgrade.
Routing Cable, Mounting Boxes, and Prepping the Panel
Once the electrical design is approved, the physical work follows the route from panel to equipment. The installer looks above ceilings, behind walls, through crawl spaces, and around finished surfaces before pulling cable. The cleanest route isn't always the shortest route. It must also protect the conductors and leave a serviceable installation.
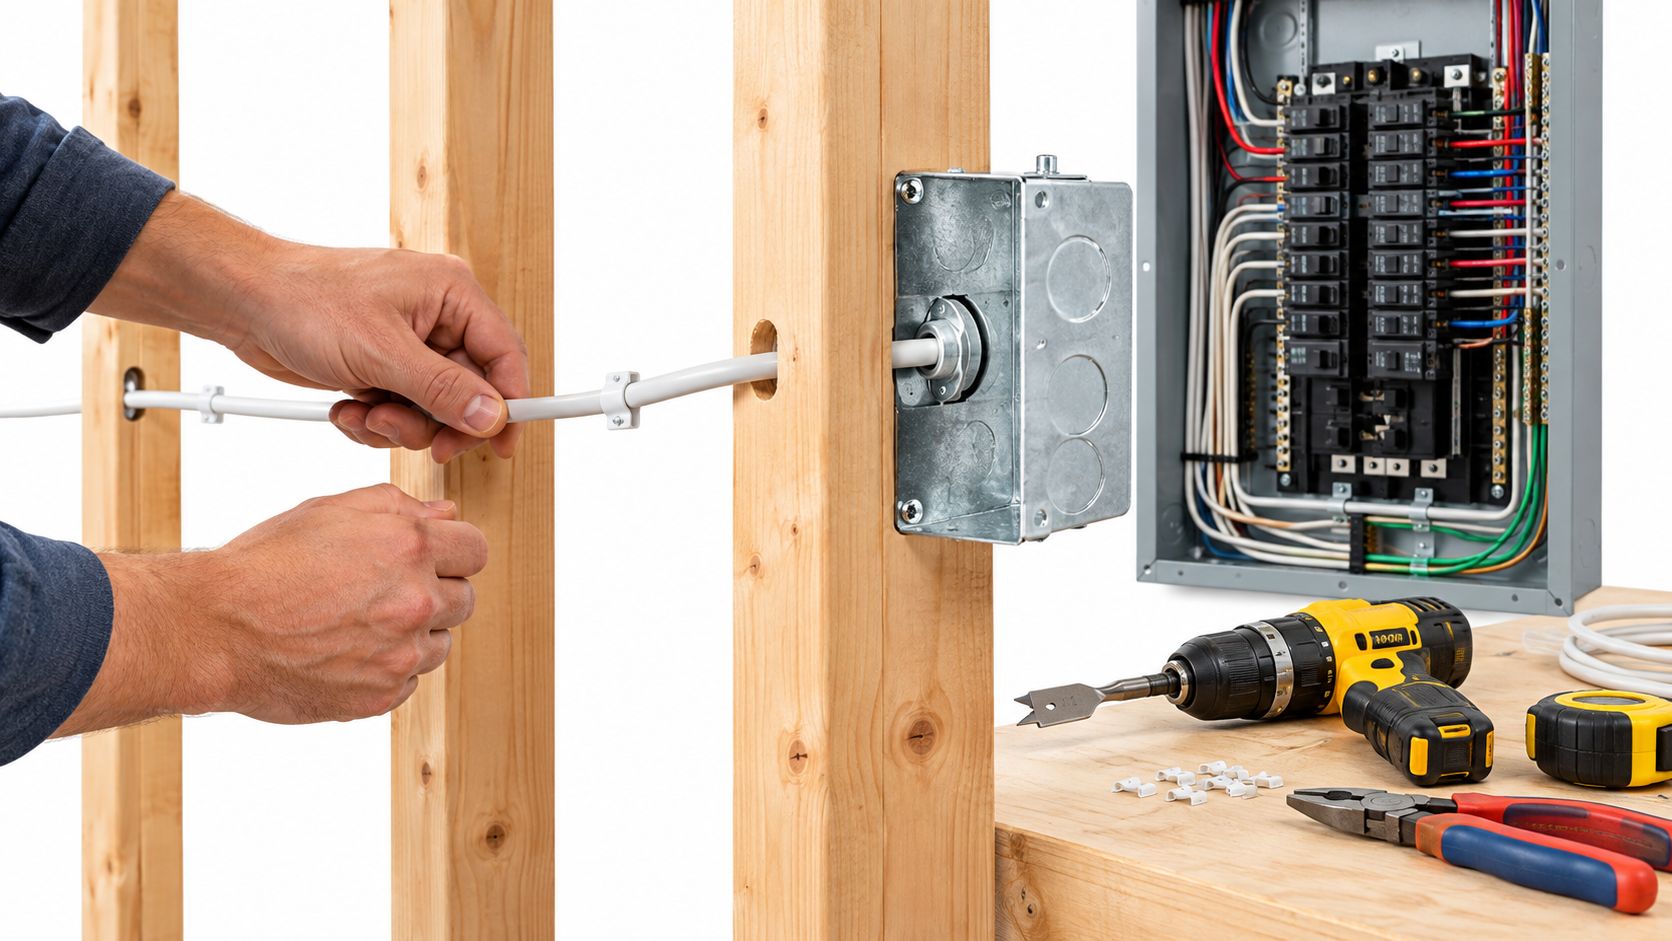
Drilling through studs and joists requires attention to future damage. Where cable passes close to the face of framing, protection plates keep later nails and screws from striking it. Cables need proper support, and penetrations through metal boxes or raceways need appropriate fittings and bushings. Fire-rated assemblies may require approved sealing methods.
Select the wiring method for the environment
NM-B may suit permitted dry, protected interior locations. THHN conductors in conduit can work where raceway is required or where the route demands a more adaptable method. MC cable may be appropriate in locations where the local code and installation conditions permit it. Exterior areas, garages, unfinished spaces, physical-damage exposure, and damp locations can change the answer.
The installer also checks box fill, conductor bending space, working clearances, and access to the panel. A crowded box or sharply bent cable creates problems that a correct breaker size can't fix.
Panel workmanship matters
The new breaker must be compatible with the panelboard and installed in an approved position. The conductors need clean stripping, correct identification, and terminations tightened to the manufacturer's specified torque with a torque screwdriver or wrench. Guessing by feel is poor practice because both loose and overtightened terminations can damage equipment or create heat.
The circuit directory should identify the equipment and location in language another electrician can understand. Before energizing, the installer should verify grounding and bonding continuity, neutral isolation where applicable, enclosure fill, cable support, working clearances, and protection devices.
A panel with an empty position is not a design. It is only a place where a design might fit.
An inspector will usually care about the same fundamentals: approved equipment, correct breaker compatibility, conductor protection, accessible connections, grounding, labeling, clearances, and evidence that the circuit matches the calculated load. Good routing makes those details visible rather than forcing the inspector to interpret improvised work.
When a Panel Upgrade Is Not the Only Option
A new high-demand circuit doesn't always require replacing the panel. The correct answer comes from the load calculation and the equipment's operating pattern, not from a blanket rule that every Level 2 charger must trigger a service upgrade.
A load-management system actively controls large appliances so the home stays within its electrical limits. Washington State electrical guidance explains that controlled loads still have to be included in the electrician's calculations, as described in its load-management requirements. That means load management doesn't erase the load. It manages when and how the equipment operates.
What managed charging changes
An energy-management system can cap EV charging so the whole home remains below a defined panel limit. If the heat pump, electric dryer, range, battery, or water heater starts drawing heavily, the system may reduce charging speed, pause charging, or curtail it until capacity becomes available.
That trade-off can be worthwhile when overnight charging remains practical and a service upgrade would be disproportionate. It isn't suitable if the owner requires uninterrupted maximum charging output during periods of high household demand.
Ask the installer specific operational questions before approving this path:
Fail-safe behavior: What happens if the controller loses power, communication, or a sensor signal?
Backup compatibility: Will the system coordinate correctly with a battery or generator?
Manual control: Can the homeowner override or adjust charging within safe limits?
Approval: Does the utility or local authority require additional review?
Listing and acceptance: Is the equipment listed for the intended use and accepted by the authority having jurisdiction?
Maintenance: Who services the controller, and how will a future electrician understand the configuration?
A panel upgrade may still be the cleanest option when several large loads are planned or when the owner wants maximum simultaneous operation. For a broader look at that decision, review the home electrical panel upgrade guide. The important distinction is that a dedicated branch circuit protects the circuit conductors, while load management or a service upgrade addresses the home's total capacity.
Testing, Commissioning, and Knowing When to Call a Pro
The circuit isn't finished when the cable reaches the receptacle or charger. Before energizing, a qualified installer verifies that the installation matches the design and that no connection was compromised during routing or termination.
Start with a visual and mechanical inspection. Confirm conductor identification and insulation condition, breaker compatibility, grounding and bonding continuity, neutral isolation where applicable, enclosure fill, cable support, working clearances, and terminal torque. Check that the receptacle, disconnect, EVSE, and other equipment are listed for the application and installed according to their instructions.
Commission the circuit under a representative load
A loaded test can reveal problems that a continuity check won't. The installer should watch for abnormal voltage drop, loose-termination heating, nuisance breaker operation, equipment fault codes, incorrect polarity, and unexpected interaction with load-management controls. The charger or appliance should run long enough to demonstrate stable operation, not just power on for a moment.
These checks address serious risks. The NFPA electrical safety guidance reports an annual average of 46,652 U.S. home structure fires in 2020 to 2024 in which electrical failure or malfunction was a contributing factor or electrical distribution, lighting, or power-transfer equipment was involved. Those fires caused approximately 527 civilian deaths, 1,580 injuries, and $2.4 billion in direct property damage annually, according to the same source.
The point isn't that every dedicated circuit is likely to fail. The point is that loose terminations, incorrect protection, damaged insulation, and poor commissioning create risks that are preventable through disciplined work.
Use this handoff checklist
Before scheduling the inspection or accepting the installation, confirm:
Nameplate: The voltage, maximum current, connection method, and equipment instructions are recorded.
Load calculation: Existing and planned household loads have been evaluated.
Capacity: Service, feeder, panelboard, bus, and breaker compatibility have been verified.
Sizing: Conductors and overcurrent protection reflect the applicable continuous-load calculation.
Listed equipment: Breakers, receptacles, disconnects, EVSE, and related components are approved for the installation.
Routing: Cable is supported, protected from physical damage, and installed with appropriate boxes, fittings, and raceway.
Terminations: Connections are identified and tightened to manufacturer specifications.
Protection: Required GFCI, AFCI, grounding, bonding, and neutral arrangements are complete.
Labeling: The panel directory and equipment labels identify the circuit clearly.
Documentation: Permit, inspection, equipment settings, circuit rating, conductor route, and test results are recorded.
A homeowner can photograph the route, read the equipment manual, organize the paperwork, and ask informed questions. The work should stop before panel terminations, new high-energy branch circuits, or AFCI and GFCI modifications unless the person performing it is qualified and authorized under local requirements. Those tasks involve shock, arc-flash, fire, code, and inspection risks that a plug-in tester can't eliminate.
The final design should also respect local amendments. Southeastern Pennsylvania authorities having jurisdiction may impose requirements that differ from general guidance, and those local rules control the project.
A bigger charger isn't automatically a better installation. Right-size the charging output to the vehicle's routine use, the available charging window, the service capacity, and the home's future loads. If the calculation shows that a lower-power charger, managed charging, or a service upgrade is the responsible choice, make that decision before materials arrive.
Amp'd Energy Solutions can assess panel readiness, install properly sized EV charging circuits, coordinate service upgrades, and integrate charging with battery backup or generator plans. Visit Amp'd Energy Solutions to discuss the dedicated circuit installation your Southeastern Pennsylvania property needs.
Comments