

Tesla Universal Wall Connector Hardwired Installation Guide
You pull into the garage at 10 p.m. with a low battery, plug in, and expect a full car by morning. Instead, the screen shows a charge rate that looks closer to a trickle than to the 11.5 kW you thought you bought. The charger is mounted, the cable fits, and nothing is tripping, so the problem isn't obvious.
That's the situation many Tesla Universal Wall Connector hardwired installation projects create when the circuit decision comes last. I would treat this as a continuous load decision first, a mounting job second, and a connector choice third. Get the breaker row, panel capacity, conduit path, and commissioning tests right, and the same charger can stay useful even if your next vehicle isn't a Tesla.
Table of Contents
Breaker Settings That Set the Charge Rate - Read the Table From Your Panel Outward
Panel Capacity Before You Choose 48 Amps - Three Houses, Three Honest Answers
Mounting Location Conduit and the Permit - What a Homeowner Should Expect From Permitting
How the Hardwired Install Proceeds - The Published Sequence With Roles Attached
Tests Before the First Overnight Charge - Run the Verification in Order - Symptoms After a Normal Looking Install
One Charger for a Later Non-Tesla - Infrastructure Choices That Keep Options Open
Breaker Settings That Set the Charge Rate
Say the connector is already on the wall and looks finished. The car still charges slowly because the installer commissioned the unit to a smaller breaker than you assumed. That isn't a defect. It's the charger obeying the circuit it was told to protect.
The Tesla Universal Wall Connector installation manual describes a hardwired, single-phase 200 to 240 volt AC appliance with a published current output range of 12 to 48 amperes and a maximum rated output of 11.5 kilowatts at 240 volts. It isn't a cord and plug device, and the instructions require wiring to be hardwired to the branch circuit breaker or disconnect. Full output uses a standard double pole 60 ampere circuit breaker.
Read the Table From Your Panel Outward
Breaker | Charger output | Power at 240 V | What it is for |
|---|---|---|---|
60 A | 48 A | 11.5 kW | Full output when the service can carry the continuous load |
50 A | 40 A | 9.6 kW | Strong daily charging on a tighter panel |
40 A | 32 A | 7.6 kW | Mid-size circuit when 60 A will not fit |
30 A | 24 A | 5.7 kW | Modest overnight charging |
20 A | 16 A | 3.8 kW | Limited spare capacity |
15 A | 12 A | 2.8 kW | Minimum published setting |
Those six documented configurations are 60 A breaker, 48 A output, 11.5 kW, then 50 A, 40 A, 9.6 kW, 40 A, 32 A, 7.6 kW, 30 A, 24 A, 5.7 kW, 20 A, 16 A, 3.8 kW, and 15 A, 12 A, 2.8 kW. During commissioning, the installer configures the device to match the installed breaker and available electrical capacity. That setting locks the charger to that circuit so it can't run above it.
If you're comparing circuit sizes before you buy wire or a breaker, review how Level 2 charger amperage is selected and then match the row to your house, not to the product box. The largest number is only available when the service, panel, feeder, conductors, grounding, and branch circuit protection can all support that continuous load. Tesla also lists a 10 kiloampere short circuit current rating, which belongs in the electrician's equipment check, not in a guess based on spare breaker spaces.
Practical rule: Circle the row your spare capacity supports today. Don't circle the row you wish the panel supported.
A smaller row isn't a failed install if it's intentional, documented, and fast enough for your overnight miles. A 40 A breaker at 32 A that's correctly wired beats a promised 48 A setting that trips, overheats a termination, or gets turned down at commissioning anyway. The waste happens when you pay for conduit, labor, and inspection while assuming 11.5 kW, then discover the unit was set to 5.7 kW because nobody checked capacity first. Mark your row now. Every later decision, from conductor size to the final test charge, should point back to that same number in your written scope.
Panel Capacity Before You Choose 48 Amps
A 48 A charger doesn't behave like a microwave that runs for four minutes. It can sit at full output for hours while you're asleep. That's why EV charging that can run three hours or more is sized as a continuous load at 125 percent, so 48 A belongs on a 60 A breaker. Putting a 48 A setting on a 50 A breaker doesn't satisfy that relationship, even if it seems close enough on paper.
Three Houses, Three Honest Answers
Newer 200 A panel, open spaces, modest loads: This house can often take the 60 A circuit after a proper load calculation confirms it. Gas heat, a gas range, and few large electric appliances leave more room.
Full 100 A or 150 A panel: This house usually needs a step down to the 40 A or 32 A output row, a load management approach, or a service upgrade. Forcing 48 A in because the charger allows it isn't honest sizing.
200 A panel already carrying range, dryer, heat pump, and well: Nameplate size alone doesn't save this house. Those loads can overlap with overnight charging, so a smaller setting or managed charging may be the reliable choice.
The panel check below is the mindset to bring to the estimate.
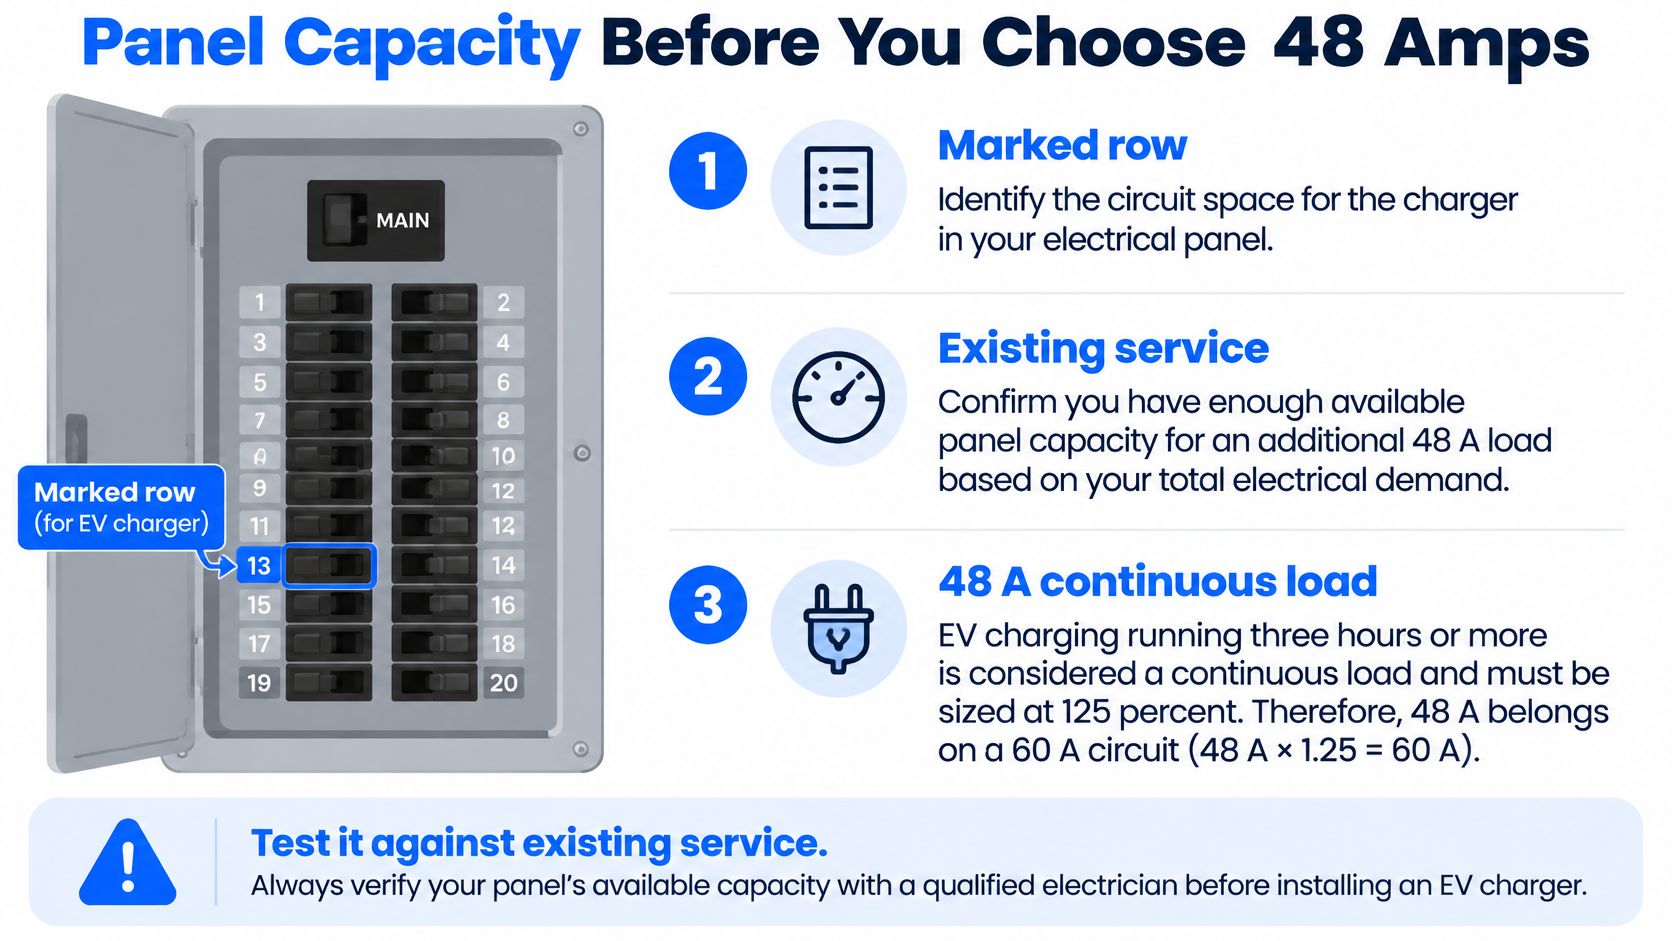
A site assessment should start with the main breaker size, available slots, feeder condition, grounding, and the large appliances already in the house. It should also ask whether a battery, second charger, hot tub, or workshop load is already planned. You can see how that math is structured in a guide to electrical load assessment calculations, but your electrician still has to apply it to your actual service and local requirements.
When the panel is aged, unsafe, or out of spaces, 200 A and 400 A service replacements become the path, including cases where the meter setup or a multi tenant arrangement also has to change. That is a bigger project than swapping in a breaker, and it should be priced separately. For electrical upgrades, we assess the current setup and explain a panel upgrade versus a full service replacement rather than forcing the 11.5 kW row onto equipment that can't carry it.
If an estimate promises 48 A without opening the panel or asking about your range, dryer, and heat pump, it isn't an assessment. It's a guess.
I would decide in this order. Keep the circled breaker if the calculation supports it, step down one row if the overnight result still works, or upgrade the service before the charger is ordered. Stepping down isn't settling if the car is ready each morning. Upgrading isn't overspending if the existing panel is unsafe or blocks the next three projects you already plan. The bad outcome sits in the middle, where you buy full output hardware, discover the service can't hold it, and then renegotiate while the wall is already open.
Mounting Location Conduit and the Permit
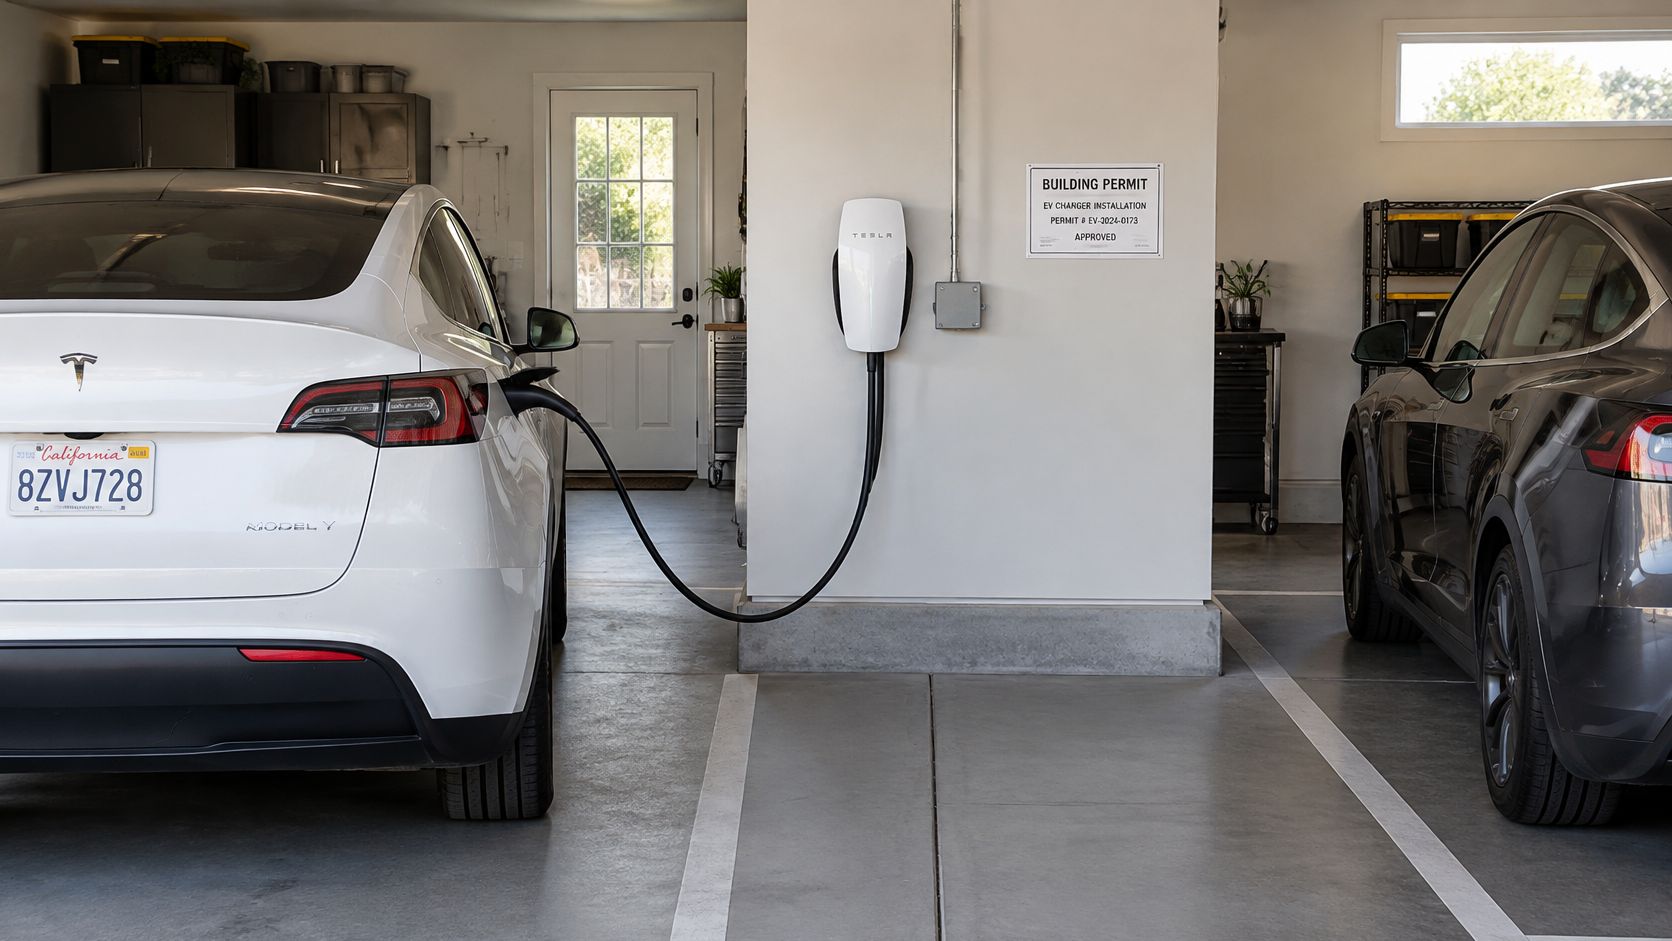
Mount the connector where you'll park on a rainy weeknight, not where it looks tidy in an empty garage. The cable should reach the charge port without crossing a walkway, dragging across a bumper, or forcing you to back in every time. Test both parking orientations before anyone drills.
For a two car garage, a side wall between stalls usually beats the back wall. The cable can often serve either bay, and you aren't stretching it around storage bins or a workbench. On the back wall, a nose in car may park its port far from the connector, while the cable becomes a trip hazard for everyone carrying groceries inside.
Outdoor mounting raises the bar. The surface has to be sound and flat enough for the enclosure to seal, and exposed fittings need weather protection. Tesla's default raceway is 3/4 inch conduit, with 1 inch conduit when the run or conductor fill needs it, and exterior hubs must be rated Type 3R. A hardwired branch circuit lands on the breaker or a disconnect. It never lands on a receptacle.
What a Homeowner Should Expect From Permitting
In a place like Southeastern Pennsylvania, the normal sequence is straightforward. The electrician files the permit, the utility gets involved only if the service itself changes, and rough and final inspections happen before the circuit is treated as finished. Local rules may also require an accessible disconnect, so ask whether that's included instead of discovering it at inspection.
Two edge cases change the price quickly. A detached garage with a long feeder may need a subpanel or larger conduit before the Wall Connector itself becomes simple. Voltage drop, trench path, and feeder capacity matter more than the last few feet of wall mounted conduit.
A finished wall chase is different. If the clean route can't take 3/4 inch conduit without opening drywall, you need to choose between surface conduit, a different route, or patching and paint. None of those choices is wrong, but they shouldn't be improvised after the holes are cut.
Before the truck arrives, confirm four things in writing.
Parking side: Which bay, which orientation, and whether the cable reaches without tension.
Indoor or outdoor mount: The exact wall, surface condition, and weather exposure.
Conduit path: Surface or concealed, default size or upsized, and who's repairing finishes.
Permit scope: Whether filing, inspections, and any disconnect are already in the electrician's price.
That checklist prevents the common mismatch where the electrical work is correct but the location is annoying every single day. A charger you have to wrestle with will get used carelessly. A charger placed where the cable falls naturally to the port becomes invisible, which is exactly what home charging should feel like.
How the Hardwired Install Proceeds
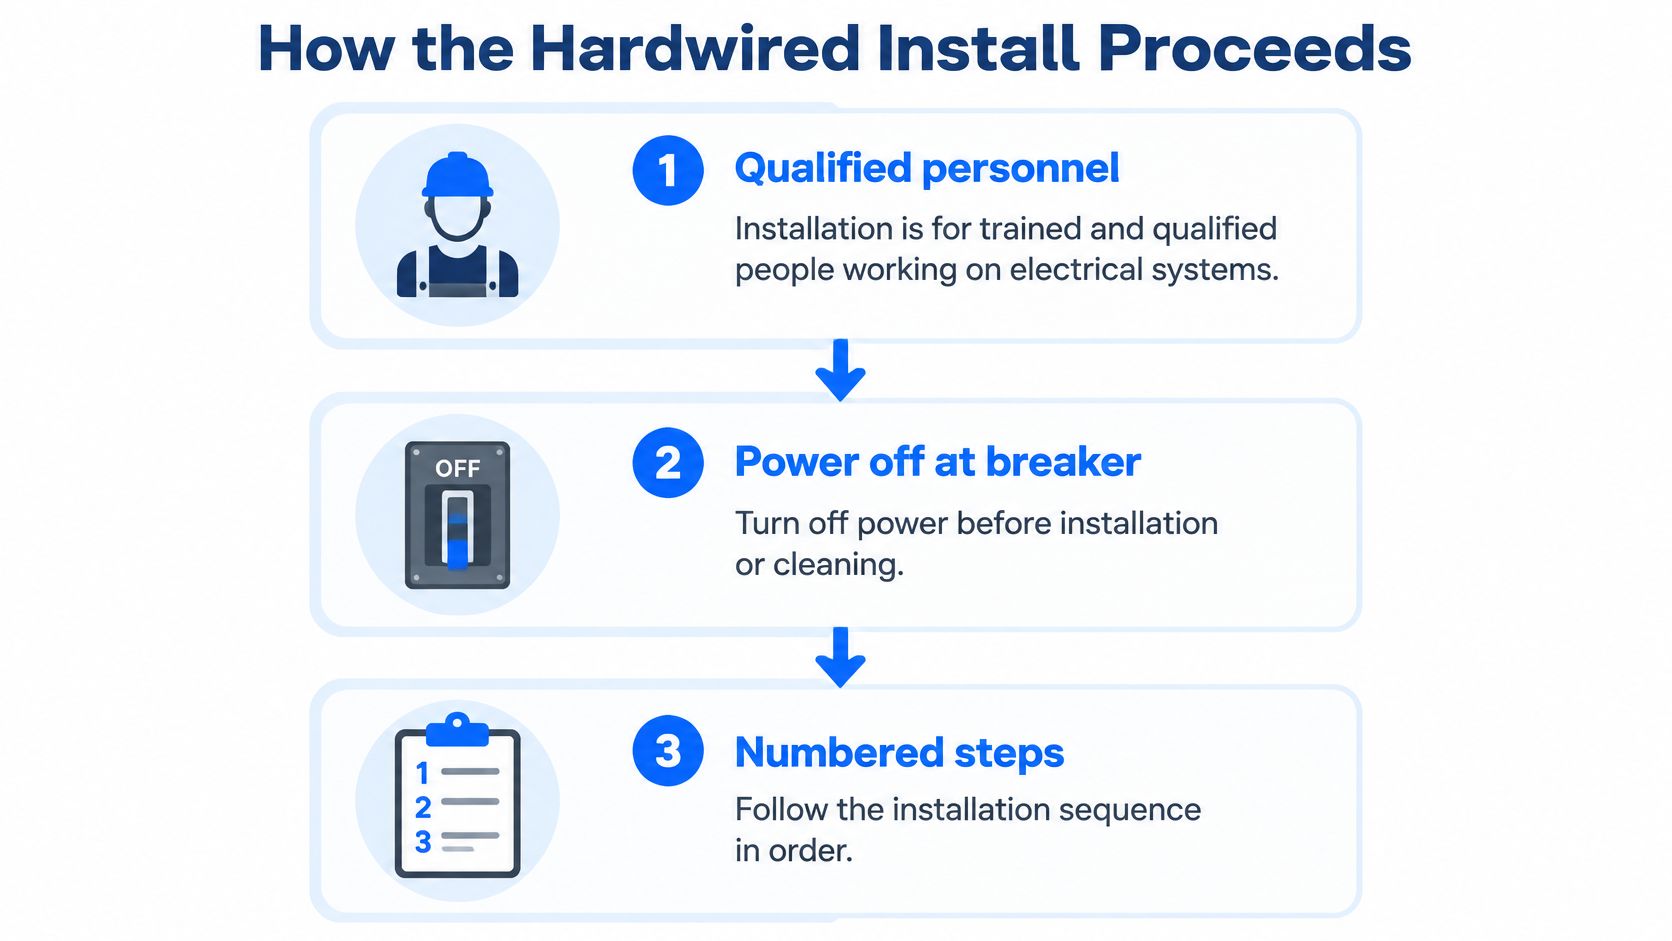
A hardwired Wall Connector goes in as a continuous load on a dedicated circuit, so the work follows a fixed sequence with inspection points built in. The Tesla Universal Wall Connector manual says installation should be performed only by personnel trained and qualified to work on electrical systems, and its safety guidance requires power to be turned off at the circuit breaker before installation or cleaning. Tesla treats the unit as a permanently wired electrical appliance, and the Wall Connector must be grounded through a permanent wiring system or an equipment grounded conductor.
Amp'd Energy Solutions is a Tesla Certified Wall Connector contractor, and our electricians are licensed. Your role is to confirm each step happens in order and that the finished setting matches the circuit you approved.
The Published Sequence With Roles Attached
Prepare the wirebox for conduit fittings: The electrician sets the entry for the conduit size chosen during planning. You confirm the route won't block doors, storage, or future work.
Prepare the mounting surface: The electrician makes sure the enclosure sits flat and secure. You confirm the parking position and mounting wall one last time before holes become permanent.
Route wiring through the wirebox: Branch circuit wiring comes from the breaker or disconnect through the raceway. You provide clear access to the panel and the full conduit path.
Strip and land the conductors: The electrician handles conductor sizing, termination, and torque. The unit is grounded through the permanent wiring system or an equipment grounding conductor.
Attach the Wall Connector: The electrician mounts the unit to the prepared wirebox and checks that the enclosure closes correctly. Outdoor installs use the weather-rated fittings specified when the mount location was planned.
Energize the unit: Power comes on only after terminations, supports, grounding, and the permit's inspection point allow it. Nobody energizes first and inspects the landing later.
Complete device setup: The installer selects the country, joins the home Wi-Fi network, and enters the current limit for the installed breaker.
Earlier planning either pays off here or gets worked around. An upsized raceway or spare panel capacity means the conductors land without rework, and a charger wired inside a generously sized circuit stays adaptable if your next vehicle needs different hardware.
Wi-Fi reach is your part of step seven. Stand where the charger will mount, check whether your phone can hold the home network there, and know which network name the charger should join before install day. Garages often sit behind masonry, metal doors, and the router's worst angle. Fixing signal with an access point is easier before the electrician is waiting on commissioning.
A clean install looks boring. Conduit is supported, the enclosure is flat, the breaker is labeled, and the programmed amperage matches the approved row.
Before the installer leaves, you should see the unit firmly mounted, the breaker clearly labeled in the panel directory, and the configuration screen showing the limit you approved. Ask to see that setting rather than accepting a verbal promise. You should also know which breaker turns the unit off, where any required disconnect sits, and what happens next with final inspection. If any answer is vague, treat the job as still open.
Tests Before the First Overnight Charge
The first session with a vehicle connected is where the circuit proves itself. The Tesla Universal Wall Connector installation guide calls for observing voltage stability, connector temperature, breaker behavior, and freedom from nuisance trips during a live test charge. A short handshake tells you almost nothing. Continuous-load sizing is why the session needs enough sustained run time at the programmed current to expose what a quick plug-in will hide.
Run the Verification in Order
Reach the programmed current: The car should pull the amperage row you approved under suitable battery conditions.
Hold line to line voltage: The reading stays stable at full current. Sagging voltage points to a loose landing or a supply problem upstream.
Watch connector temperature: The connector and terminations stay at a normal temperature through the session. Heat at the handle or the lugs exposes a torque problem.
Run without a trip: The breaker holds the programmed load for a sustained session. A trip under a correctly programmed limit means the landing or the protection device needs attention.
A full battery-to-empty session is unnecessary for handover. What the test needs is enough minutes at the programmed current for a hot termination, an unstable voltage reading, or a weak breaker to show itself. This is the payoff of treating the install as a continuous-load circuit decision from the start: the verification measures the exact condition the wire, breaker, and terminations were chosen to survive.
Before handover, the packet should list breaker size, conductor size and material, conduit type, measured line to line voltage, grounding verification, torque values, charger setting, and test charge results. Outdoor installations add a Type 3R enclosure and hub check to that record. Keep the packet with your panel records. The next electrician, inspector, or homebuyer shouldn't have to reverse engineer the circuit.
Symptoms After a Normal Looking Install
Symptom | Likely cause | Correction |
|---|---|---|
Current well below the chosen row | Breaker setting left low, or a hot termination | Re-enter the installed breaker size and retorque landed conductors |
Breaker trips during a long session | 48 A programmed on a breaker that is not 60 A, or a loose connection | Correct the programmed limit to match the installed breaker and redo the landing |
Commissioning fault with no charge | Wi-Fi on the wrong band, or setup never finished | Confirm the 2.4 GHz band and complete the programming |
Outdoor fault after rain | Hub or enclosure not kept weather tight | Confirm Type 3R hubs and enclosure integrity |
Every row in that table describes a charger that works while the circuit or the setup fails: reduced charging current, repeated trips, thermal stress at terminations, or commissioning faults. Check the setting, the landing, and the network band before anyone diagnoses a bad unit.
Finish by reading the car's reported amps against the row you approved. If you paid for the 40 A output row, the car should show approximately that current under suitable battery conditions. If it shows far less and nobody can say whether the vehicle, the setting, or a termination is limiting it, the first overnight charge is the wrong moment to find out.
One Charger for a Later Non-Tesla
Your next vehicle may not wear the same badge as the one in the garage today. The hardwired circuit behind the charger does not care which badge it feeds. The federal Joint Office charging connector guide confirms the SAE J3400/NACS connector supports AC Level 1 and Level 2 charging, works with J1772 vehicles through an adapter, and reports that major automakers announced J3400 adoption beginning in 2025.
Physical compatibility is where the guarantee stops. Adapter policy, charge port location, cable reach, and manufacturer restrictions vary by vehicle, so verify the next car's adapter rules before assuming it will plug in. A connector that reaches a rear port easily can sit awkwardly against a front port in the same bay. Settle that mounting question before the second vehicle arrives.
Infrastructure Choices That Keep Options Open
Conduit route: Choose a path that can be extended or reworked without demolishing finished walls.
Disconnect access: Include an accessible disconnecting means where your township requires one.
Spare panel capacity: Don't consume every usable space and amp for one setting if a second vehicle is likely.
Load management strategy: Plan how charging will share the service instead of blindly oversizing to 48 A on a panel that can't hold it.
Commissioning treats every vehicle the same way. The installer selects the installed breaker size during setup, and the 125 percent continuous-load pairing governs the current limit regardless of the badge in the driveway. If you're weighing connector formats while planning that flexibility, review the Level 2 EV charger plug types before committing the wall location.
Take the 40 A circuit at 32 A and 7.6 kW row. At that rate each charging hour returns about 7.6 kWh to the pack, so an eight-hour overnight window restores roughly 60 kWh, a full refill for most daily driving on either connector. Choosing that row also leaves panel spaces and capacity free for a second charger or a battery later. I would rather preserve those options than spend the whole service on the fastest possible single-car session today. Future-proof the service and raceway, not just the charger setting, and one hardwired unit can serve different vehicles across its service life without opening the wall every time the household fleet changes.
Schedule the Circuit Assessment
By now your decision should fit on one page. Don't call three electricians with only a product link and hope their guesses converge.
Build a short scope packet first: panel photos, main breaker size, open slots, desired overnight miles, and a note about whether a future battery or second charger should be planned in now. Add a photo of the parking bay with the car in its normal position. That packet turns a vague price request into a continuous-load circuit question, the kind an electrician answers with a breaker size instead of a guess.
A licensed, Tesla-certified installer can review that packet and explain whether a panel upgrade or a full service replacement is the right path before the charger is ordered. A free consultation covers those options, and you can call 267-450-6992 or email sales@ampd.life to schedule one or request a quote.
Ask for the written scope to name the proposed breaker, programmed output, grounding method, conduit method, and whether permit and inspections are included. If the scope says only that a charger will be installed, it leaves the important decisions unpriced. I'd also ask whether the connector format being quoted leaves room for a non-Tesla later, since that answer costs nothing now and can save a second wall opening in a few years.
Your next action is one step: send the packet and request the written scope before you book the work.
Send your panel photos, parking bay, and desired overnight charging goal to request a free consultation. The written scope puts the proposed breaker, programmed output, and upgrade options on paper before you order equipment. Start at Amp'd Energy Solutions and schedule today.
Comments