

How Much Is a Level 2 EV Charger
A typical residential Level 2 EV charger installation costs roughly $1,200 to $1,400, including the charger and installation. Hardware alone is often $400 to $700, while the rest pays for the circuit, wiring, labor, permitting, and inspection.
That national benchmark is useful, but it isn't the number that decides your project. The cost driver is your house. A charger mounted close to a capable panel may be straightforward. An older home with a crowded panel, a distant garage, or a long conduit route can turn the same charging equipment into a much larger electrical project.
The practical question isn't only, “How much is a Level 2 EV charger?” It's whether your home needs a simple circuit add, a load-sharing device, or a panel or service upgrade. Solve that question before you choose a brand.
Table of Contents
What a Level 2 EV Charger Actually Costs in 2026 - What a normal quote should include - What the benchmark leaves out
Charger Hardware Prices by Amperage and Features - Features that add cost
Installation Labor Permits and Wiring - Ask for an itemized scope
Whether Your Panel Can Handle a Level 2 Charger - Inspect the panel, not just the label
Three Ways to Add Level 2 Charging Without a Full Panel Upgrade - Path one, share an existing circuit - Path two, manage the load dynamically - Path three, upgrade the service
How Location and Distance Change the Final Price - The route decides the budget
Right-Sizing the Charger to Your Car and Driving Habits - Match charging speed to the overnight window
What a Level 2 EV Charger Actually Costs in 2026
The most useful national reference comes from the EV Project, which recorded an average residential Level 2 installation cost of $1,354, with a median of $1,200. Those figures included permit fees and service upgrades but excluded the charger itself, so they aren't a perfect all-in retail price. The same data showed substantial geographic variation, with Los Angeles averaging $1,828 and Atlanta averaging $775 for the installation work described in the study. See the EV Project residential installation cost analysis for the underlying benchmark.
For a homeowner budgeting today, I use $1,200 to $1,400 as a sensible starting point for a normal residential job when the charger is included, while keeping a broader working range of $800 to $5,000 for real-world homes. Straightforward charger-plus-installation scenarios have also appeared in broader ranges of roughly $380 to $1,400, which reinforces the point that a short, uncomplicated run costs much less than an upgrade-heavy installation.
What a normal quote should include
A standard quote should identify the wallbox, a dedicated 240-volt circuit, the breaker, wiring, conduit, connection method, permit, and final inspection. Depending on the installation, the charger may connect through a NEMA 14-50 receptacle or be hardwired.
Use this table as a measuring stick, not a promise that every home will land in the middle.
Category | Low | Typical | High |
|---|---|---|---|
Charger hardware | $339 | $400 to $700 | $900+ |
Labor and standard materials | $500 | $500 to $1,000 | $1,500+ |
Permit and inspection | Included or modest | Varies locally | Varies locally |
Panel, service, or major site work | $0 | Conditional | $2,700 to $6,000+ |
Total project | $800 | $1,200 to $1,400 | $5,000 or more |
The $339 to $900+ hardware range reflects recent 2026 pricing summaries for mainstream and premium units, as reported in Level 2 charger pricing guidance. The higher end isn't automatically better. It often buys more amperage, different installation requirements, or premium features that your vehicle and electrical system may not use.
What the benchmark leaves out
The typical number generally assumes the panel has capacity, a breaker position is available, and the charger isn't far from the panel. It doesn't automatically cover a full service change, a new subpanel, trenching, long underground runs, or repairs to finished drywall, stucco, masonry, or landscaping.
Read every quote for exclusions. A low sticker price that omits the permit, wire route, panel work, or inspection isn't a low project cost. It's an incomplete quote.
Charger Hardware Prices by Amperage and Features
Plan on $250 to $900+ for charger hardware. That range matters less than the electrical work behind it. Before choosing a brand or chasing maximum amperage, determine whether your home needs a panel upgrade, a load-sharing device, or a straightforward circuit addition. That decision usually drives the final project cost.
A practical hardware budget looks like this:
Amperage Tier | Examples | Price Range |
|---|---|---|
Basic, non-connected unit | Simple 32-amp charger | $250 to $350 |
Entry smart tier | 32-amp connected charger | $350 to $500 |
Mid-tier home unit | 40-amp charger with scheduling | $500 to $650 |
Premium hardwired tier | 50-amp unit with extended features | $650 to $850 |
High-amperage premium | 80-amp product | $900+ |
These ranges come from the 2026 hardware pricing summary in the Level 2 EV charger buying guide. Amperage is an electrical design choice, not a status symbol. A 40-amp or 48-amp charger covers overnight charging for many drivers. An 80-amp unit can waste money when the vehicle's onboard charger cannot accept that power, or when the home would need expensive electrical changes to support it.
Features that add cost
Smart Wi-Fi, scheduling, usage monitoring, and app controls raise the equipment price. RFID access suits workplaces or shared parking areas, while most single-family homeowners do not need it. Cable length and the choice between plug connection and hardwiring also affect the equipment line.
Choose features around your charging routine. Scheduling earns its keep when your utility offers off-peak pricing. Load management is the better purchase when the panel is tight because it can help avoid a larger electrical upgrade. A longer cable helps when the parking position changes, but it should not compensate for poor charger placement.
My recommendation: For most homes, buy a dependable mid-tier smart charger and put the savings toward proper circuit design, neat conduit, and a panel assessment. Do not pay for 80 amps unless your vehicle can use it and the electrical system can support it.
Before buying, compare your vehicle, parking location, and electrical capacity with this guide to choosing the best Level 2 EV charger. The longest feature list is not the goal. The right charger is the one your car can use and your home can safely support.
Installation Labor Permits and Wiring
The other half of a normal installation is electrical work. A quote that separates hardware from labor makes it easier to see whether you're paying for a clean circuit installation or subsidizing unrelated panel work.
Electrician labor commonly runs $75 to $150 per hour, with 4 to 8 hours of work producing a normal labor range of $300 to $900. Those figures are planning ranges, not a guaranteed invoice, because access, routing, drilling, and local code requirements determine how long the job takes.
Line Item | Typical Cost | Notes |
|---|---|---|
Electrician labor | $300 to $900 | Depends on access and routing |
Two-pole breaker | $40 to $100 | Must match the panel and circuit |
Copper conductors | $4 to $8 per foot | Size depends on design and code |
Conduit and fittings | $80 to $200 | Surface-mounted routes are common |
Disconnect, if required | Varies | Site and local requirements control |
NEMA 14-50 receptacle | $30 to $60 in parts | Used when plug-in flexibility is desired |
Permit and inspection | $50 to $300 | City and county fees vary |
The labor, breaker, wire, conduit, receptacle, and permit ranges above come from the supplied installation planning data. A neutral government estimate also places residential Level 2 installation at about $1,300 per connector excluding labor and permitting, while another federal transportation source cites an average of $1,400 for a single-family home. Those references are useful because they show why the installed project can't be judged by the charger's retail price alone. See the federal residential charger installation estimate.
Ask for an itemized scope
The written quote should state the circuit amperage, wire type, approximate footage, conduit method, breaker, receptacle or hardwire connection, permit responsibility, and inspection responsibility. It should also list panel modifications separately.
If the electrician says the job needs more capacity, ask whether that means a load calculation, load management, a subpanel, or a service upgrade. Those are different solutions with different costs. This EV charger installation guide can help you understand the work before you approve it.
Whether Your Panel Can Handle a Level 2 Charger
The panel is where experienced electricians find the answer. A charger can be perfectly compatible with your vehicle and still be a poor fit for a house that has no spare capacity.
Start with three checks:
Main rating: Read the main breaker and identify whether the service is rated at 100 amps, 150 amps, or 200 amps.
Breaker space: Look for an open position that can accept the required two-pole breaker. An empty-looking space isn't always usable, especially in older or damaged panels.
Existing load: Account for electric heat, an oven, dryer, water heater, air conditioning, workshop equipment, and other high-demand circuits.
A 40-amp charger draws 32 amps continuously under the charging rules used for continuous loads. On a 100-amp service, that can leave little practical headroom once an electric dryer, oven, and HVAC system operate together. The electrician should perform a load calculation instead of guessing from the number of open breaker spaces.
Inspect the panel, not just the label
Age and condition matter. The panel brand, bus connections, corrosion, overheating, and recalled equipment can change the recommendation entirely. A charger installation isn't the right time to ignore a panel that already shows damage or unsafe construction.
Distance matters at the same time. A panel with capacity may still produce an expensive job if the charger must sit across the house or in a detached garage. The circuit needs an appropriate route, conductor size, protection, and physical support.
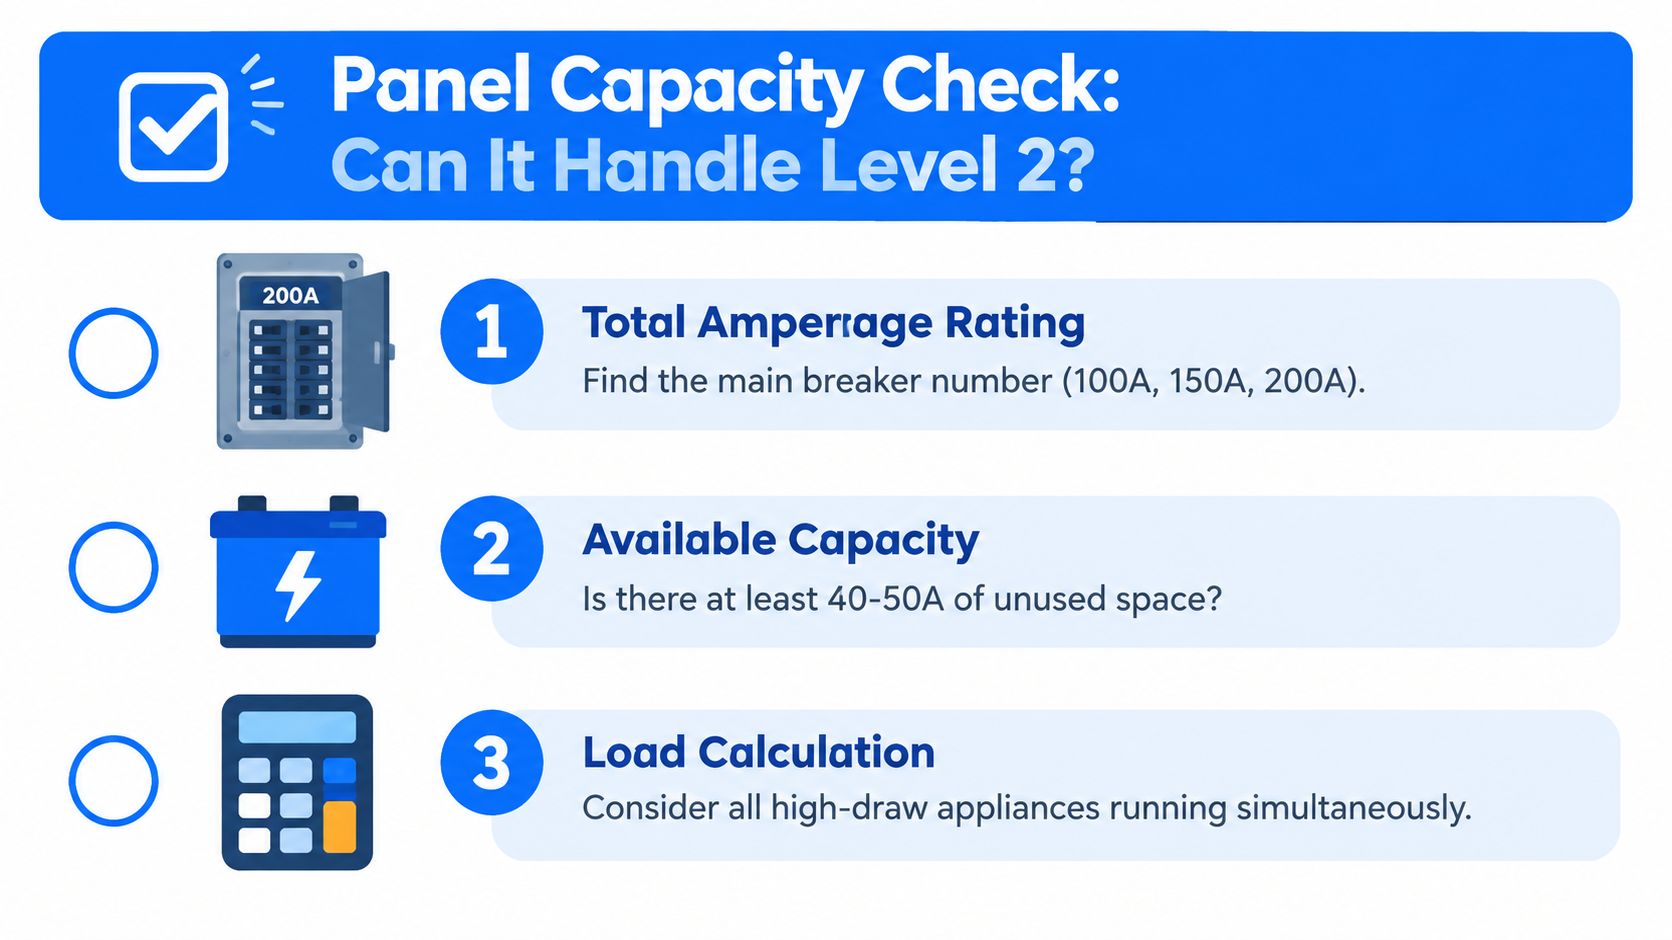
Jobsite rule: An open breaker slot does not prove that your service can support an EV charger. The load calculation does.
If the panel passes the capacity, space, and condition checks, the project can remain close to the normal residential benchmark. If it fails one, don't jump straight to a full service replacement. First compare load management, circuit sharing, and a subpanel with the cost of a complete upgrade. A home electrical panel upgrade assessment should explain those choices rather than recommend the largest possible service.
Three Ways to Add Level 2 Charging Without a Full Panel Upgrade
A tight panel does not automatically require a new service. In older homes, the key decision is whether you need a shared circuit, a load-management device, or a full upgrade. Choose based on the home's actual electrical demand, not the charger brand or its maximum output.
Approach | Typical Installed Cost | Charging Speed Impact | Best For |
|---|---|---|---|
Shared 240-volt circuit | $800 to $1,500 | Charging pauses while the shared appliance runs | Homes with an existing suitable dryer or range circuit |
Smart load sharing | $1,000 to $2,500 | Charger output adjusts to household demand | Homes with limited spare capacity |
Panel or service upgrade | Varies by scope | Full dedicated capacity | Older or overloaded systems needing broader improvements |
The practical alternatives to a full upgrade usually fall within roughly $800 to $2,500, depending on equipment, wiring, and installation conditions. Treat those figures as planning ranges, not guaranteed installed prices.
Path one, share an existing circuit
A listed smart splitter can let an EV charger and an existing 240-volt appliance use one circuit without operating at the same time. The equipment must match the circuit, receptacles, charging equipment, and local electrical requirements. It cannot turn an undersized circuit into a larger one or justify overloading it.
This is a good choice when the dryer or range runs occasionally and the vehicle can charge during the remaining hours. Skip it if the household regularly needs both loads operating together.
Path two, manage the load dynamically
A load-management system measures household demand and reduces charger output as the home approaches its service limit. Charging slows during high-use periods and increases when capacity becomes available again.
For overnight charging, that trade-off usually works well. It can cost less than rebuilding the service to run the charger at its highest setting. Have the installer confirm that the system is compatible with the service equipment and that the load calculation supports the proposed setup.
Path three, upgrade the service
A panel or service upgrade makes sense when the existing equipment is unsafe, overloaded, physically obsolete, or unable to support several planned loads. It is also the right move if the homeowner expects electric heating, additional EVs, storage, or other major electrical additions.
Commercial charging work shows how quickly infrastructure costs can rise. Three 50-amp Level 2 chargers were estimated at $53,100 total, including $6,500 of charging equipment. Three 80-amp chargers with a new transformer reached $89,400. The federal EV charging site-assessment report shows that transformer and feeder work can dominate a charging project's budget.
For a typical house, I recommend pricing load sharing and circuit sharing before approving a service upgrade. If the panel is unsafe or future electrical demand is growing, upgrade it once and solve the broader problem.
How Location and Distance Change the Final Price
The route from your panel to the charger parking position often matters more than the charger brand. A short, open path can keep the installation straightforward. A long route through finished areas, masonry, or a detached garage can change the labor, materials, and restoration work substantially.
A charger beside the panel may need only a short, accessible circuit. Move it to the far end of a finished basement, across a masonry wall, or into a detached garage, and the job may require additional drilling, protection, conduit, trenching, or feeder work. Finished surfaces can also create drywall or other repair work that an electrical-only quote excludes.
The route decides the budget
Measure the actual path before requesting estimates. Include vertical rise, horizontal run, bends, wall penetrations, attic or crawl-space access, and the final distance to the charger. A straight line from the panel to the car rarely reflects the installed route.
The supplied planning guidance identifies long runs, trenching, subpanels, masonry, and finished-surface work as major cost drivers. It also places concrete, masonry, and attic routing at $200 to $800, while permit and inspection fees can range from $50 to $400 or more, depending on the jurisdiction. Treat these as planning references, not guaranteed local prices.
Site Condition | Effect on Cost | What to Confirm |
|---|---|---|
Charger beside the panel | Lower labor and material demand | Mounting surface and circuit route |
Long interior run | More wire, conduit, and access work | Exact footage and repair responsibility |
Exterior masonry | More drilling and weatherproofing | Penetration sealing and equipment rating |
Detached garage | Possible trenching or feeder work | Underground route and subpanel needs |
Finished basement or attic | More labor and restoration risk | Who handles drywall or finish repairs |
A historical national study found residential installation averages ranging from $775 in Atlanta to $1,828 in Los Angeles, showing how geography, labor, and electrical conditions affect the final price. Commercial and public work varies even more. The Department of Energy reported non-residential Level 2 installation costs from $600 to $12,700, with an average of $2,979 across workplace and public chargers in its historical dataset. See the Department of Energy EVSE cost report.
Require the installer to put the route and footage in writing. A quote that says “standard wiring” without identifying the path is too vague to approve.
Right-Sizing the Charger to Your Car and Driving Habits
Higher amperage is not automatically better. It can require a larger circuit, more expensive conductors, and a stricter panel calculation, while your vehicle may not accept the added power. Choose the charger around the car's onboard charging rate, daily energy use, and the home's electrical capacity.
Mainstream 40-amp to 48-amp hardware typically costs around $339 to $695, while premium 80-amp equipment costs $900 or more. Treat those figures as planning guidance, not the main buying decision. The larger cost question is whether your home needs a simple circuit addition, a load-sharing device, or more extensive panel work.
Match charging speed to the overnight window
Use this table as a planning framework, not a promise of exact miles. Vehicle efficiency, battery temperature, charging losses, and the car's onboard limit all affect the result.
Amperage / Circuit | Charging Speed | Time to Add 100 Miles | Best Fit For |
|---|---|---|---|
24 amps / 30-amp circuit | Moderate | Vehicle-dependent | Lower daily mileage and constrained panels |
32 amps / 40-amp circuit | Strong home charging | Vehicle-dependent | Most single-EV households |
40 amps / 50-amp circuit | Faster home charging | Vehicle-dependent | Higher daily use and overnight recovery |
48 amps / 60-amp circuit | Near the practical home upper tier | Vehicle-dependent | Vehicles that support it and homes with capacity |
80 amps / dedicated high-capacity circuit | Specialized high output | Vehicle-dependent | Compatible vehicles, commercial-style demand, or luxury installations |
A 32-amp or 40-amp setup is usually enough when the car remains home overnight and the driver does not return with a nearly empty battery every day. For most homes, this is the sensible starting point. It provides strong overnight recovery without paying for capacity the vehicle may not use.
A 48-amp unit earns its cost when the vehicle supports it, the household has spare electrical capacity, and faster recovery solves a real driving need. Confirm all three before selecting it.
An 80-amp charger is a specialty choice. Do not buy it just because the number is larger. The vehicle may limit actual intake, and the home may need expensive electrical work to supply the circuit.
Better upgrade strategy: Install conduit with future capacity and leave room in the panel when practical. That preserves flexibility without paying today for speed you do not need.
Smart Steps Before You Buy or Schedule an Install
The most common expensive mistake is buying the charger before checking the house. Start with the electrical system, then select equipment that fits the approved design.
Use this checklist:
Photograph the panel. Capture the main breaker, panel label, breaker layout, and any visible heat, corrosion, or damage. Don't remove the dead front cover yourself.
Count usable breaker spaces. An apparent opening may not be suitable for the required breaker, and some panels have compatibility limits.
Measure the route. Walk from the panel to the intended charger location and record the actual path, not just the straight-line distance.
List major loads. Include electric heat, cooking, drying, water heating, air conditioning, workshops, pools, and any planned equipment.
Request itemized quotes. Ask at least two licensed electrical contractors to separate hardware, labor, wire, conduit, breaker, permit, inspection, panel work, and surface repairs.
Ask about load management. If the panel is tight, require a comparison between a simple circuit, managed charging, shared-circuit equipment, and a service upgrade.
Check utility pricing. Ask the utility whether time-of-use plans or charging incentives apply to your account. Confirm eligibility directly before building the project budget.
A site assessment often saves more money than a charger discount because it prevents the wrong equipment purchase and exposes the expensive work before installation day. For homeowners in Southeastern Pennsylvania, Amp'd Energy Solutions provides EV charger installation, panel-readiness assessments, permitting support, and electrical service upgrades for Level 2 projects.
Amp'd Energy Solutions can assess your panel, map the charger route, and provide an itemized installation plan before you buy hardware. Visit Amp'd Energy Solutions to schedule a site assessment for a properly sized, code-compliant Level 2 EV charger.
Comments