

How to Hook Up Whole House Generator
You're standing in the driveway with a generator delivery scheduled, a storm season in sight, and a dozen questions no sales brochure answers cleanly. The unit itself is only one piece of the job. A real whole-house generator hookup is a coordinated electrical, fuel, and inspection project, and if any one piece is out of order, the system won't do what you bought it for.
Table of Contents
Planning the Install Before Anything Gets Wired - Siting comes before trenching - Fuel choice drives the rest of the job
The Physical Hookup From Pad to Inlet - Start with the pad and the set - Then the electrical path
Choosing and Wiring the Transfer Switch - Ampacity and switch type have to match the service - Neutral and grounding are the real decision tree
Commissioning, Testing, and Inspection - What should be checked first - Outage simulation should feel controlled, not rushed
What Hooking Up a Whole House Generator Actually Means
A homeowner outside Lancaster can buy a 22 kW standby unit and still have a dead backup system if the rest of the project never gets finished. That's the part that is often missed. Owning the generator is not the same as having usable backup power, because the system has to be integrated with the home's service, fuel supply, and transfer equipment before any load can move safely from utility power to generator power.
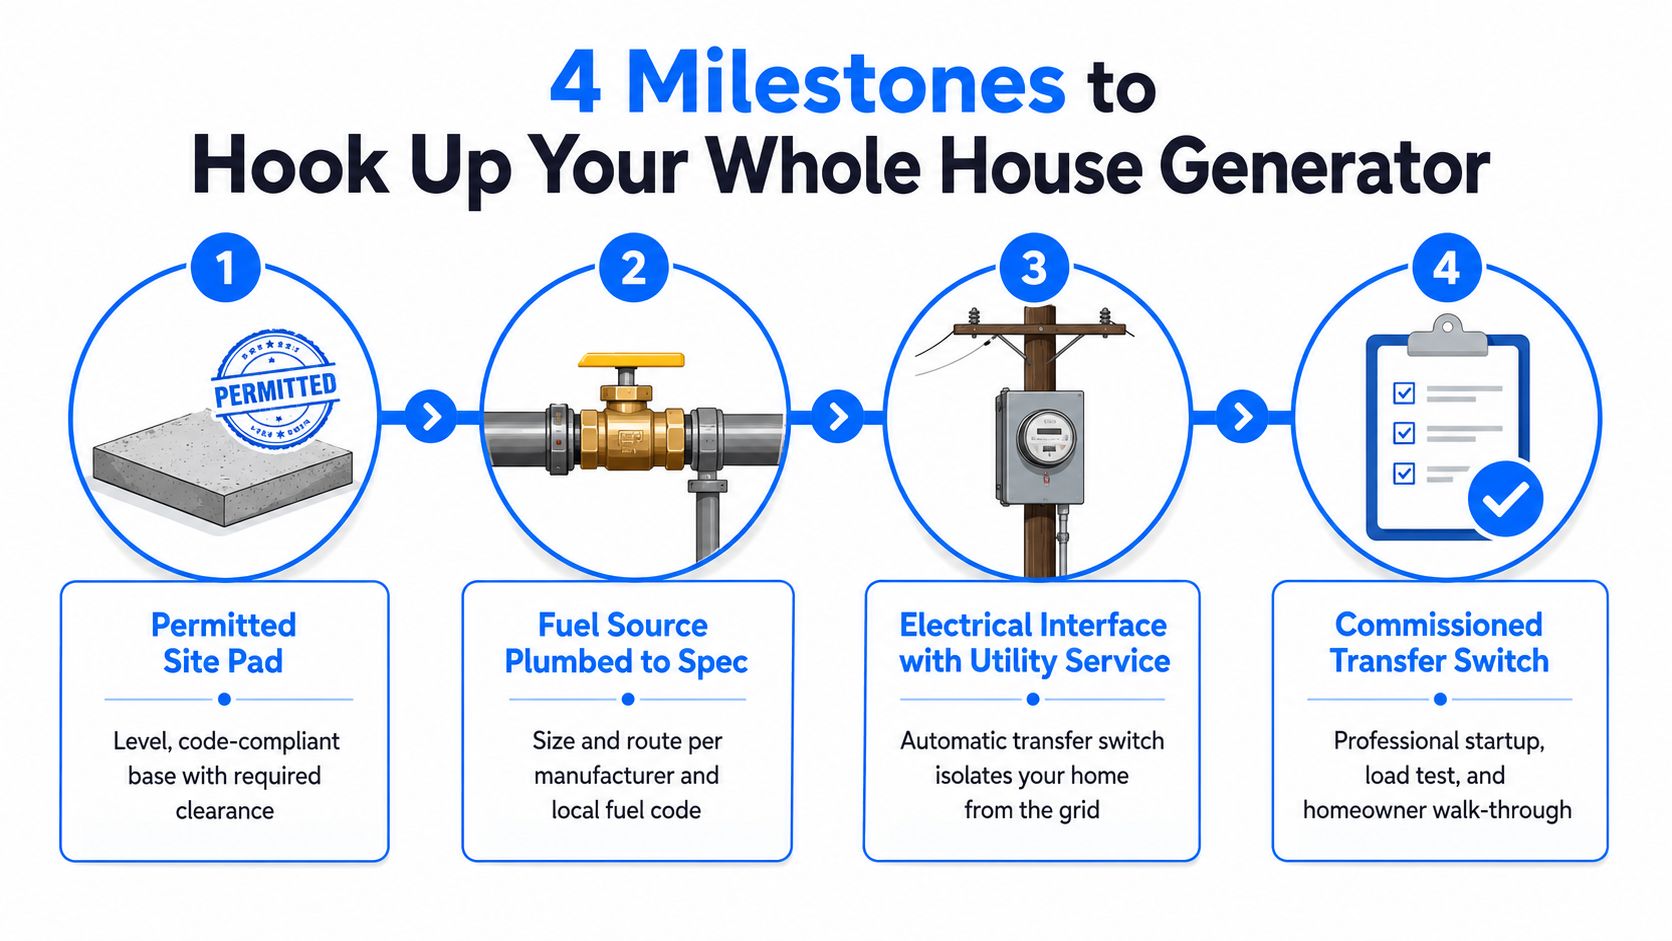
A proper hookup has four milestones. First comes a permitted site pad. Then the fuel source is plumbed to spec. After that, the electrical interface with utility service gets built. Last is the commissioned transfer switch, where the system is tested, labeled, and signed off so it works when the grid goes dark.
That's why this job usually involves more than one trade. Electricians handle the transfer equipment and panel work, gas technicians handle the fuel run, concrete or site prep crews may set the base, and an inspector verifies that the finished install meets code. The labor often sits in the interface, not the box sitting outside.
If you're comparing generator options and layout ideas, this whole-home generator overview is a useful place to see how the pieces fit together. The rest of the decision order still matters more than the brand badge on the cabinet.
Planning the Install Before Anything Gets Wired
The first mistake I see is sizing by square footage instead of actual load. That doesn't tell you what the house really needs. A better approach is to list the circuits and appliances you want to keep alive, then size the generator around those running loads and startup demands, not around the total size of the property.
Siting comes before trenching
Location isn't a detail you figure out at the end. Generator placement has to respect manufacturer clearances and outdoor siting rules, including the practical 5-foot window and door setback and the 18-inch wall offset that many installers work around during layout. If the pad lands in the wrong spot, the fuel run, electrical conduit, and service access all have to be reworked later.
Practical rule: if the site forces a long gas run or a cramped conduit path, the “easy” location usually becomes the expensive one.
Fuel choice drives the rest of the job
Natural gas is often simpler when the service is already there, but the line still has to be sized correctly for the generator's demand. Propane can work well where gas service isn't available, but tank placement and refill access need to be thought through before the concrete cures. In the field, an undersized gas line is one of the most common reasons a generator stumbles under load, because the unit may start fine and then starve once the electrical demand rises.
Permitting has to follow the order too. Electrical and gas permits are typically separate, and the utility may need a disconnect notification before the work begins. If you skip ahead and pour the pad or run conduit before the paperwork is aligned, you can end up undoing finished work just to satisfy inspection sequencing.
Generator Sizing by Home Load Profile | Typical kW Range | Fuel Recommendation |
|---|---|---|
Critical-circuits backup | Qualitatively smaller | Natural gas or propane, depending on site conditions |
Partial-home backup | Mid-range | Natural gas when available, propane where storage makes more sense |
Whole-house continuity | Qualitatively larger | Natural gas if service and line capacity support it, propane if the property is built around tank storage |
If you're mapping fuel and permit timing together, this gas-focused generator planning guide helps frame the fuel side of the decision without treating it like an afterthought.
The Physical Hookup From Pad to Inlet
Once the layout is settled, the install becomes a sequence of visible checkpoints. I tell homeowners to watch the job like an inspector, not like a helper. You don't need to pull conductors or make terminations to know whether the work is being done cleanly.
Start with the pad and the set
The generator needs a stable outdoor base. For smaller residential units, that's often a prepared gravel bed or a concrete pad, depending on site conditions and local practice. Larger air-cooled units benefit from vibration isolation and a level base, because a unit that rocks or settles will make the rest of the install harder to keep aligned.
The fuel line usually comes next, from the gas meter or propane source to the unit. That run needs proper burial depth, a shutoff placed where it can be reached, and pressure test documentation before anyone closes up the trench. If the fuel side isn't documented, there's no reason to pretend the job is ready for commissioning.
Then the electrical path
The electrical route is just as deliberate. The generator feeds through weatherproof conduit to a service-rated connection point, then into the power inlet box or the transfer equipment that matches the system design. The inlet box should be mounted where it's accessible, visible, and matched to the generator plug configuration so nobody improvises with the wrong cord end later.
A homeowner can't and shouldn't torque every lug, but you can absolutely ask to see the torque marks, verify the inlet matches the intended connector, and confirm the conduit is protected and neatly routed.
That last point matters because people get tempted to “make it work” with an old dryer outlet or some other backfeed shortcut. That's not a clever workaround, it's exactly the kind of setup that puts utility lines and house wiring at risk. A real hookup uses the proper inlet and transfer path, not a guessed-at adapter chain.
Choosing and Wiring the Transfer Switch
This is the part where a lot of DIY advice gets vague, and it's the part I'm most cautious about on site. The transfer switch is the heart of the whole-house system, because it separates the utility from the generator before any load is energized. If it's sized wrong, wired wrong, or paired with the wrong neutral setup, the install can look finished and still be unsafe.
Ampacity and switch type have to match the service
The switch has to match the service rating and the backup strategy. For a 200 A service, the transfer equipment needs to be rated accordingly when the goal is true whole-house backup, and that's consistent with code guidance that the switch must carry the full load of the section being transferred. In practical terms, that means the switch is not a generic accessory, it's part of the service architecture. Manufacturers also standardize around 200A whole-house transfer products, including utility and generator combinations designed for residential backup applications.
The choice between automatic transfer switch (ATS) and manual transfer switch depends on how much automation the homeowner wants and how the generator is built. An ATS senses utility loss and starts the generator. A manual transfer switch requires the homeowner to start the unit and move the load by hand. Both can work, but they are not interchangeable with every generator or every panel layout.
Neutral and grounding are the real decision tree
The job becomes more technical than most homeowners expect. A separately derived system needs a switched neutral and a grounding electrode arrangement at the generator. A non-separately derived system keeps the neutral-to-ground bond at the main service only. The wrong pairing can create unsafe current paths and code violations, which is why the generator's bonding style has to be checked before the switch is energized.
Transfer Switch Configuration by Service Type | Neutral Configuration | Ground Bonding | Switch Type | Typical Use |
|---|---|---|---|---|
Separately derived | Switched neutral | Bonding at generator side per design | ATS or manual switch designed for switched neutral | Systems where the generator is treated as an independent source |
Non-separately derived | Solid neutral | Bonding at main service only | Solid-neutral transfer equipment | Systems that keep the neutral reference at the service equipment |
The switch should be mounted close to the main panel, or connected through a short protected conduit run, so conductor paths stay clean and compliant. If you want to review how this choice affects future panel work, this service-upgrade reference is worth keeping handy. Amp'd Energy Solutions is one installer that handles generator selection, installation, and integration with automatic transfer equipment in Southeastern Pennsylvania, which is the kind of full-scope approach this project usually needs.
Commissioning, Testing, and Inspection
A wired generator is still just hardware until it's commissioned. I've seen plenty of installs that looked neat at a glance but failed the first serious test because no one checked the sequence, labeling, or transfer behavior under load. That's why the final stage is about proving the system, not admiring the workmanship.
What should be checked first
Start with a visual review. Look for torque marks on lugs, secure conductors, clean labeling on the backed-up circuits, and a clear working sightline between the generator and the transfer equipment. If the labeling is vague, the homeowner will be guessing during the first outage, and guessing is how mistakes happen when the lights are out.
With utility power still available, start the generator and let it stabilize before moving any load. Transfer a single non-critical circuit first, then watch for voltage behavior and any odd breaker response. After that, test the backed-up circuits one at a time so you can see whether one branch is causing a problem that gets hidden when everything is switched at once.
Outage simulation should feel controlled, not rushed
Once the individual circuits behave, simulate an outage by opening the main breaker and letting the ATS cycle as designed. Every backed-up load should come up in the expected sequence. Then let the generator run under a sustained load long enough to verify fuel supply, exhaust clearance, and vibration behavior.
Inspection note: in most jurisdictions, the electrical inspector has to sign off before the utility restores or reconnects service, so the permit card and final approval aren't paperwork for later, they're part of the shutdown-to-live sequence.
That's also the point where any homeowner walk-through should happen. You want to know which switch does what, how the unit sounds in normal operation, and what the reset process looks like after an outage. A good install leaves no mystery at the panel.
Pitfalls to Avoid and Ongoing Maintenance
The costliest hookups usually fail for simple reasons. People size the generator to the air conditioner nameplate instead of the actual running load, they bury the inlet box where snow and shrubs block access, or they assume the fuel side will “probably be fine” because the pipe is already on the property. Those shortcuts don't save time. They create service calls.
The neutral and grounding mistake deserves special attention. If the generator is treated as a separately derived system, the bonding has to be done the right way. Skip that detail and you can create unwanted current paths through metal piping or other conductive parts of the home. The install may still appear to function, but it won't be right.
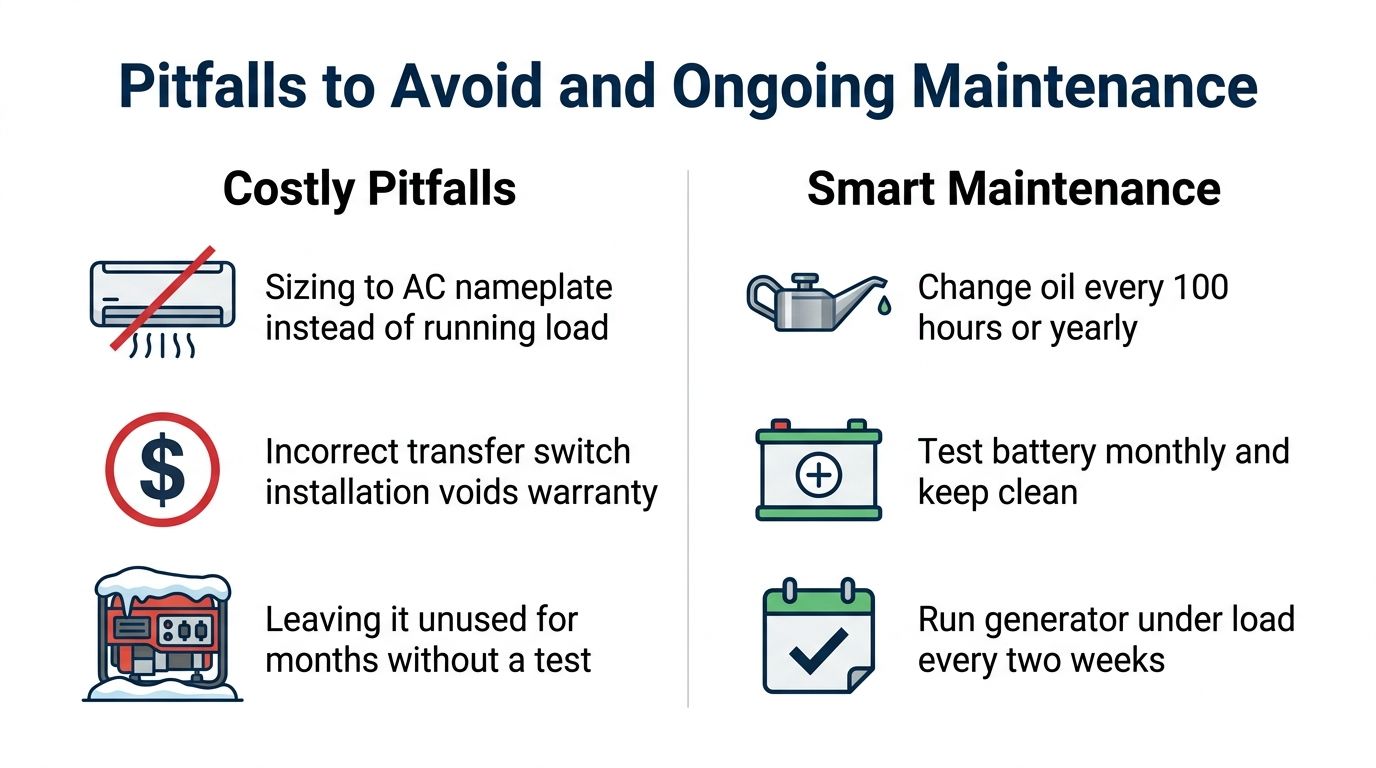
Maintenance is what keeps the hookup ready for the next outage. Exercise the generator weekly under load so the engine stays healthy, then change oil and filters on the generator's service schedule instead of pretending calendar time is enough. Keep the battery clean and tested, and inspect the transfer switch contacts before small wear becomes a failure.
A hookup that sits idle for months is not a finished asset, it's deferred trouble. If you want the system to work when the next storm hits, you need a maintenance rhythm that treats the generator, transfer switch, and fuel system as one working assembly.
If you want a whole-house generator hookup planned and installed with the transfer switch, fuel routing, and permit sequence handled in the right order, Amp'd Energy Solutions can scope the job, size the system, and complete the integration with ongoing maintenance support. Visit Amp'd Energy Solutions to talk through your home, your load needs, and the cleanest path to backup power that works when the grid fails.
Comments